From Friday, April 19th (11:00 PM CDT) through Saturday, April 20th (2:00 PM CDT), 2024, ni.com will undergo system upgrades that may result in temporary service interruption.
We appreciate your patience as we improve our online experience.
From Friday, April 19th (11:00 PM CDT) through Saturday, April 20th (2:00 PM CDT), 2024, ni.com will undergo system upgrades that may result in temporary service interruption.
We appreciate your patience as we improve our online experience.

Customizing controls in LabVIEW only takes minutes and can make a big impact in the usability and visual appeal of your LabVIEW application. Common reasons for wanting to use custom controls include:
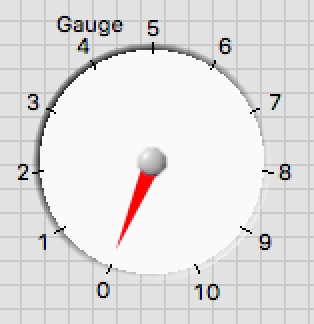
This tutorial will demonstrate how to customize the gauge control in LabVIEW. Other controls follow similar steps and the principals learned here will easily translate.
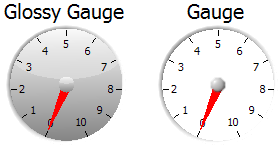
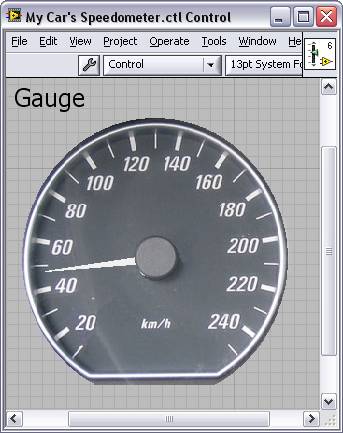
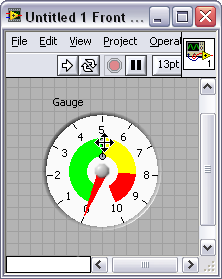
This tutorial will use the gauge from the modern palette to demonstrate how to customize a standard LabVIEW control.
2. There are numerous elements of the gauge control which we can edit. The needle is the notable exception (although you can change its color). There is an advantage to leaving the default frame as it is a vector graphic which scales very nicely. Scaling effects are most visible around the edge of your control so leaving the default frame while customizing the background image and the center piece is a good compromise between scalability and customizability. In this example we will replace the background and center piece.
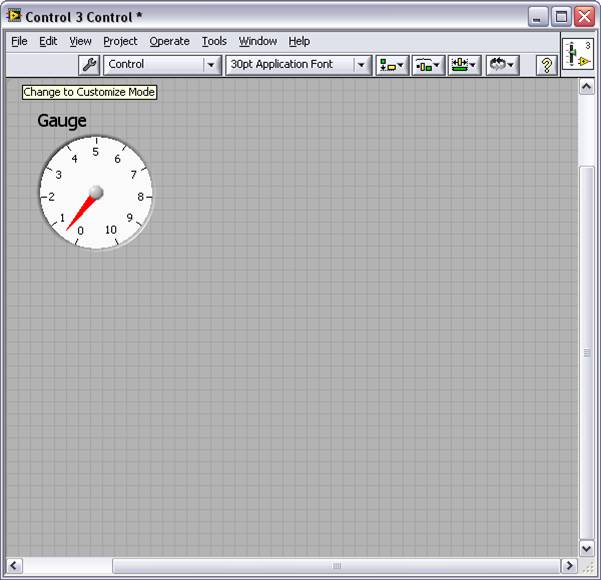
3. Now you have your background image created it’s time to switch back to LabVIEW. Right click on your gauge and select Advanced»Customize to bring up the control editor.

4. Change to Customize Mode by clicking on the wrench icon on the toolbar
5. Customize mode allows you to move, rescale or replace any of the stock components of a control. In order to use your new background image, right click on the current dial and select Import from File at Same Size….
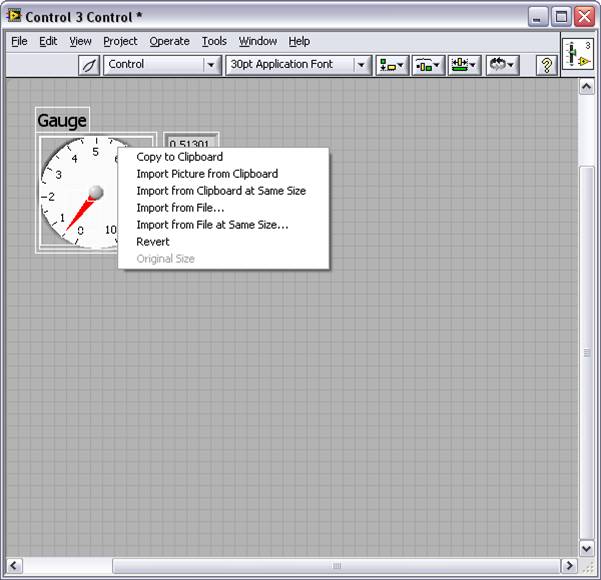
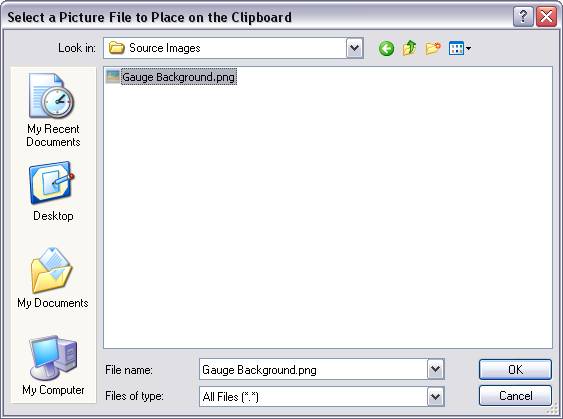
6. Browse to select your new background image.
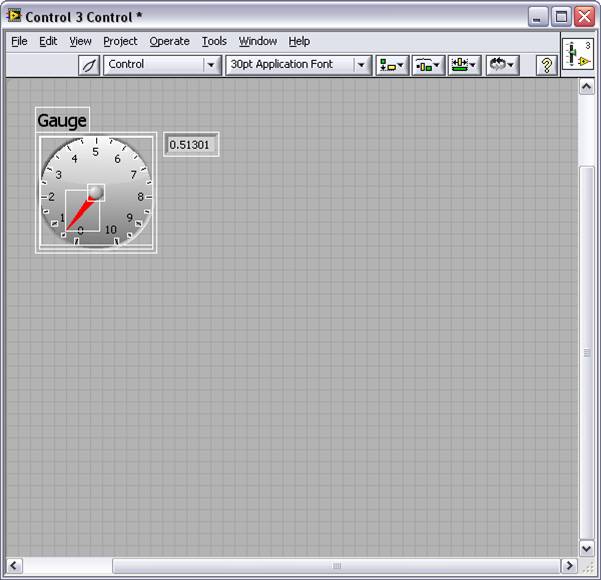
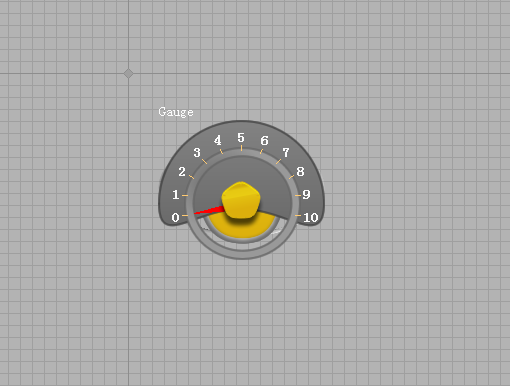
7. You background will take the place of the original plain background.
8. The center piece of the gauge is also replaceable using the same technique. For this example right click and select Import from File at Same Size… and use the same background image. You will end up with something like this:

9. Save your new control by selecting File»Save.
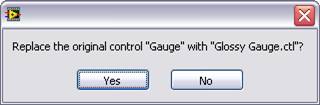
10. Now when you close the control editor LabVIEW will prompt you if you want to replace the original control. Click “Yes”.
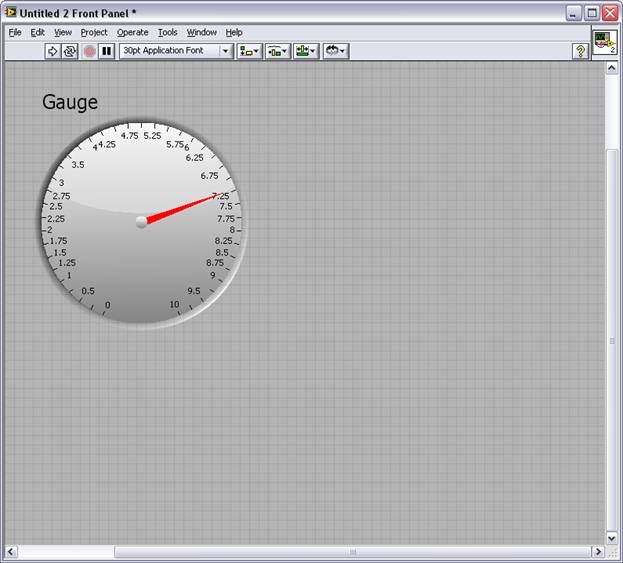
11. Congratulations you have created a nice looking, reusable gauge. As we created a large background image and kept the original frame your gauge will rescale nicely up to, and probably a little beyond, the size of the original background image size.
12. This is a quick and easy example of what is possible. Using the control editor you can create almost any style of gauge you’d like, here are few of my favorites:
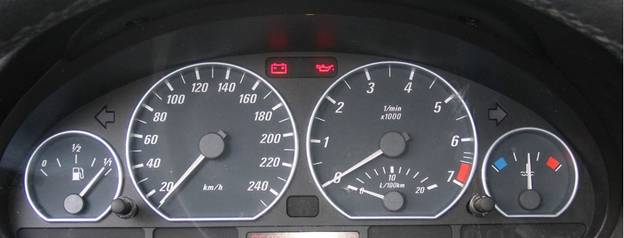
13. In addition to using custom created graphics, using real-life images such as photographs can lend provide a familiar interface to users who are not familiar with virtual instruments. In this last sample you can see how a photo can be used as the basis of a custom control:
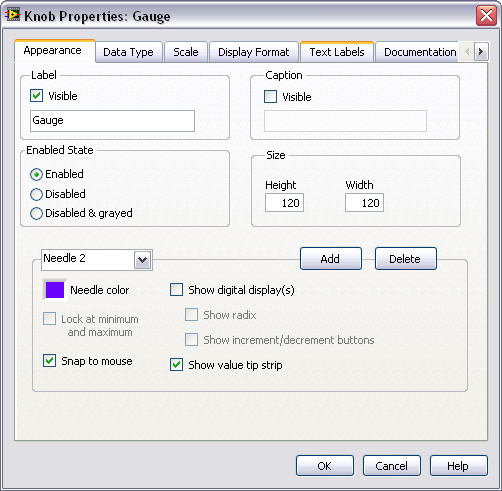
You can add additional needles to your gauge or change the color of existing needles by right clicking on the gauge and selecting Properties and then the “Appearance” tab.
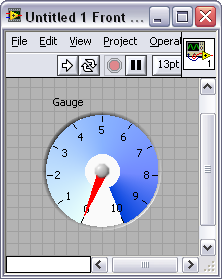
The ramp has a number of customizable factors. First of all is whether or not it is displayed at all – you can enable it from the “Scale” tab of the Properties dialog. The other visual option you have here is “Interpolate Color”. This option gives you a constant gradient between colors as opposed to blocks of solid color
Changing the color of your ramp is done with the same color tool you can use for just about any front panel element in LabVIEW. You can bring up the tools palette by holding Shift and right clicking on the front panel. This works in both interpolated and non-interpolated mode. Even if you intend for your finished product to be interpolated it may be easier to turn it off while you pick colors and then let LabVIEW interpolate once you are done.
You can also adjust the radius and thickness of the ramp by clicking and dragging the handles located at the 12:00 position.
Finally you can adjust the starting point for your gauge by hovering over a tick mark until your cursor changes (as shown below) and then rotating the entire scale around.
I strongly encourage anyone who is creating custom controls to share them with the community if your situation allows. Any customizations can be saved and distributed very easily by simply saving your custom control and uploading the .ctl file to this community group. As the group grows and more controls are posted you might be able to just download the design you want rather than creating it from scratch as shown here. You can find all the controls I showed in this tutorial in the attached zip file.
Description-Separate-2
Example code from the Example Code Exchange in the NI Community is licensed with the MIT license.
Who's got the Canadian vehicle??
Well, Simon is a Brit. Makes for a good excuse if you get caught speeding... "I don't know what 30 mph is!"
Great job Simon, by the way.
Actually Britain still uses mph. It would be too expensive to change all the road signs to km.
First of all, I want to say thank you very much. I am now looking for a guideline to make my front panel resemble real automobile dashboard. And your help is available. I just a temporary labVIEW learner, so I really like to see your example file, but I only have LabVIEW 8.5. Do you mind saving as file for 8.5 or older verson. If you wouldn't upload on this site, just send to my e-mail address: Esley.Ng@gmail.com.
And I want let you know that your name will be appear in my project (gratitude page) like a contributor. Your tutorial is the key I need to finish my work.
The document clearly says:
" There are numerous elements of the gauge control which we can edit. The needle is the notable exception (although you can change its color)."
But what if I need to have a thicker needle. Is this possible?
Thanks
The needle can be replaced with any of the "line" decorations and maintain its rotational functionality. Perhaps "Thick line with arrow" would work for you?
Unfortunately, you cannot replace the needle with arbitrary graphics or modify its shape directly.
Hi Christina,
Thanks for the prompt response.
Unfortunately the "Thick line with arrow" is thinner than the default needle in the gauge.
Thanks,
Fab
I thought maybe you just needed the tip more visible. Is it that you still want the triangular shape but you want the base (at the center of the gauge) thicker?
We want to keep the triangular shape and just make it thicker.
The operators sit far from the monitor, they want to have a way to tell from a distance where the needles are at. At this point they don't need to see the exact number where the needles are pointing at, but more the relative position of the needles. There is a digital display to tell them the exact number.
Since there is no way to edit the thickness of the needle, I will suggest adding the ramp to the dial to see if that would help them.
Thanks again,
Fab
And just in case someone else sees this post and is trying to do the same thing, there is an idea that needs your vote:
http://forums.ni.com/t5/LabVIEW-Idea-Exchange/Custom-Meter-Gauge-Needles/idi-p/1006643
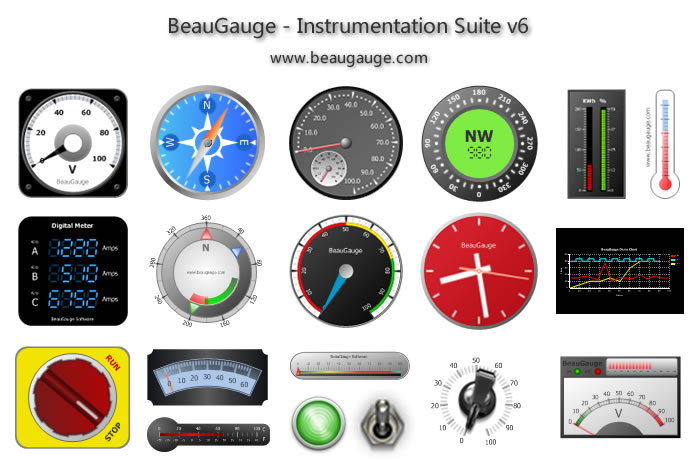
Beaugauge,
Those look great, can they be used in LabVIEW?
Fab
Answering my own question:
1) The beaugauge can be used in LabVIEW, because they are Activex controls.
2) The beaugauge controls cost money (start at $995)
...
I would prefer for LabVIEW to offer more customization capabilities:
Related ideas:
http://forums.ni.com/t5/LabVIEW-Idea-Exchange/Update-Front-Panel/idc-p/1020365#M3177
http://forums.ni.com/t5/LabVIEW-Idea-Exchange/Custom-Meter-Gauge-Needles/idi-p/1006643

"How to use BeauGauge ActiveX control in your LabVIEW project"
http://www.beaugauge.com/en/edu034.html

They're definitly impressive looking guages.
If nothing else, they cetainly show the cost of the LabVIEW development system to be quite reasonable.
Please feel free to take a glance at my solution ...
Servus
Hi Folks,
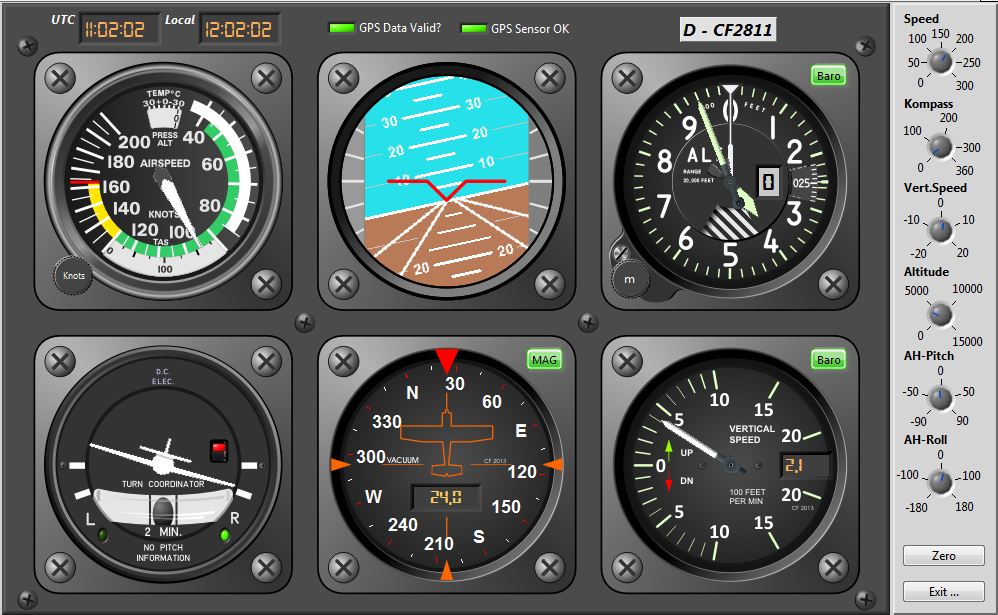
just to show you the progress ... altitude gauge, turn bank indicator including the inclinometer as well as the other gauges are fully working now !
have Fun
Great Job.
Thanx
Very Nice Gauges!
I just want to ask if we can change the length of a needle without affecting the length of other needles on the gauge. Appreciate your help. Thanks.
Hi Folks,
now, the cat is out of the bag 
http://forums.ni.com/t5/LabVIEW/Airplane-Instruments-quot-Six-Pack-quot/td-p/3232032
Merry Christmas ... Ho..Hoo..Hoo
Carsten
Whow, verry nice. And... yes, ho.. ho.. ho... try it at the hollidays. Does someone worked on controls as a joystick?
Merry Christmas and a Happy New Year.
Wijnand
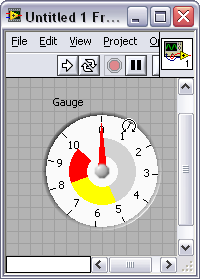
nice work,i just anolog the second gauge,but the scale is outside the number in my control,while yours scale is inside the number,cant figure it out,could u tell me how to move the scale inside the number?
I believe what you want is the "Reverse Ticks" command that's in the context (right-click) menu on a scale in the Control Editor.

fantastic,great thx.Kudos to U!
Awesome work! are you willing to share the files?
Thanks.
Yes I can share it.
But the controls are not resizable.
![[LabVIEW Programming]](https://forums.ni.com/t5/image/serverpage/image-id/230839iE26605501D6A8F85/image-size/large/is-moderation-mode/true?v=1.0&px=999)
Cool. Thanks!
I have a question, I have a gauge and I want to set it so I have on the ramp two red sections, two yellow and a green one. Is that possible? I'll try to show two examples, 1 is how I have it now. 2 is my goal. any help pls? (I know the photo looks awful, but a physical representation explain more than just words 🙂
If you didn`t find the answer and for anybody else.
You can insert more colours to your colour ramp if you check custom scale devision.
Then you have to click on the place of the scale where you want to have it and insert a new subdivision. Now it is necessary to check that automatic mouse mode on this way you can move your subdivision on the rim or you can change the division by using the text mouse mode. With every new subdivision comes a new placeholder for colouring the colour ramp. You can see this easily if you uncheck the colour transitions option.