From Friday, April 19th (11:00 PM CDT) through Saturday, April 20th (2:00 PM CDT), 2024, ni.com will undergo system upgrades that may result in temporary service interruption.
We appreciate your patience as we improve our online experience.
From Friday, April 19th (11:00 PM CDT) through Saturday, April 20th (2:00 PM CDT), 2024, ni.com will undergo system upgrades that may result in temporary service interruption.
We appreciate your patience as we improve our online experience.
Overview
This document discusses the use of NI CompactRIO or NI Single-Board RIO as a machine vision platform together with MoviMED’s AF-1501 C-series module analog framegrabber.
Content
1. Introduction
2. Setting Up CompactRIO/ Single-Board RIO
3. Installing the AF-1501 driver
4. Setting Up LabVIEW
Introduction
The NI CompactRIO programmable automation controller (PAC) is an advanced embedded control and data acquisition system designed for applications that require high performance and reliability.
With the system's open and embedded architecture, small size, extreme ruggedness, and flexibility, you can use commercial off-the-shelf (COTS) hardware to quickly build custom embedded systems.
When combined with the NI Vision Development Module 2009 and above, CompactRIO is an effective platform for embedded and industrial, real-time machine vision applications.
Potential use areas include autonomous robotics , medical devices , industrial monitoring applications , and embedded applications.
MoviMED’s AF-1501 is the first C-series module to allow image acquisition on the CompactRIO platform. The AF-1501 acquires monochrome images and supports NTSC/PAL and SECAM video standards.
Setting Up CompactRIO/Single-Board RIO
To install the proper software on CompactRIO or Single-Board RIO hardware, you must first install it on the host PC. The only necessary components are NI Vision 9.0 (or above), LabVIEW Real Time 9.0 (or above) and NI RIO 3.2.x (or above).
You can verify this software in Measurement & Automation Explorer (MAX) by expanding the software tab under My System.
Once you have verified that the host PC has the correct software, you need to install that software on your CompactRIO controller so you can acquire images from the AF-1501.
Plug the AF-1501 frame grabber into Slot 1 and make sure that the Ethernet is connected to the cRIO and the PC.
The CompactRIO controller should appear in MAX under the Remote Systems tab. Expand the target and then right-click on Software and select Add/Remove Software.
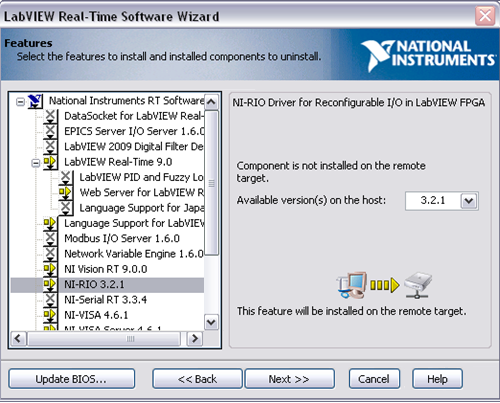
This opens the LabVIEW Real-Time Software Wizard. Select Custom software installation and click Next. Select Yes to continue with the manual installation.
The three required pieces of software are NI NI Vision 9.0 (or above), LabVIEW Real Time 9.0 (or above) and NI RIO 3.2.x (or above). Install any required dependencies of the mentioned three components.
Once you have selected all of these to install, click Next to begin the installation.
When you have finished installing the required software and the system has rebooted, your system is setup for using the AF-1501.
Installing the AF-1501 driver
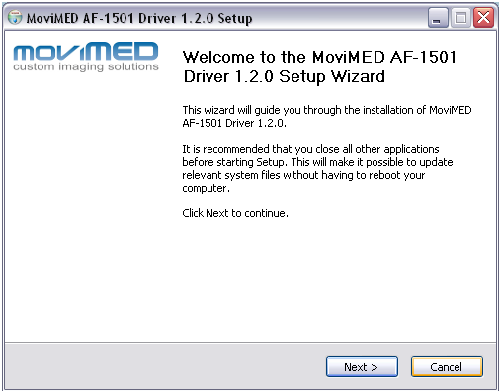
In order to operate the AF-1501, the user needs to download the driver from http://www.movimed.com/AF1501-framegrabber.htm. Once the driver is saved to disk double click on it.
The installer will prompt the user to select where to install the necessary files and whether to install the documentation to the system.
To use default settings and file locations, click Next until you reach the last window and finally Install.
Setting Up LabVIEW
Now that the CompactRIO/ Single-Board RIO controller is configured properly and the AF-1501 driver is installed you need to set up a LabVIEW project to use the Analog Framegrabber in your system.
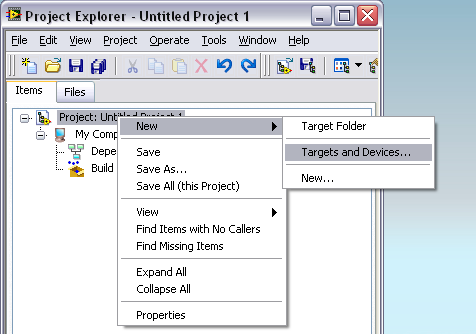
To do this, open a new project in LabVIEW by going to File»New… Then expand Project and select Empty Project. LabVIEW then creates a project named Untitled Project 1.
Right-click Project: Untitled Project 1 and select New»Targets and Devices…
Expand Real-Time CompactRIO or Real-Time Single-Board RIO. The name of the CompactRIO or Single-Board RIO controller with the AF-1501 should be listed. Select it and click OK. Select Continue it is necessary to use the CompactRIO FPGA to use the AF-1501 frame grabber.
It is important at this time to ensure that the AF-1501 driver has already been installed. Otherwise the next steps will not conclude successfully.
The CompactRIO controller is now listed as a target in the project. Browse the project hierarchy in your RIO target and go to your FPGA target and check if the AF-1501 (already plugged in previous steps) has already been detected.
If it has been detected it would show up as Mod1 (Slot 1, AF-1501). Depending on your target the module will or will not be detected. If your module was detected skip the following paragraph.
If the AF-1501 was not automatically detected right-click on the FPGA Target in your project and select New -> C-Series Module. A new window opens and you should select to add a New target or Device, then select C-Series Module and click OK.
The wizard is now going to ask which module you want to add to the project and you should find the AF-1501 in the drop down Module Type control. Select Slot 1 for the location of the module and then click OK.
Once the RIO target (CompactRIO or Single-Board RIO) and the AF-1501 are correctly detected the user is ready to start coding.
In the Project go to Help -> Example Finder. Once the window pops up, type AF-1501. An example named “AF-1501 Examples” should be found there.
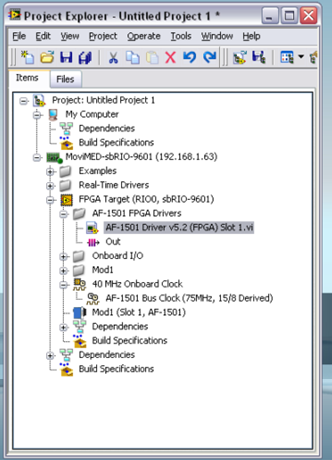
With both projects open, copy the following items and folders from the “AF-1501 Examples” project to your project:
- Folder Examples at the RT level
- Folder Real-Time Drivers at the RT level
- Folder AF-1501 FPGA Drivers at the FPGA level
- AF-1501 Bus Clock on the derived clocks
When you copy the clock item, you will need to double click on it and change the name to exactly match “AF-1501 Bus Clock”, to avoid compilation problems.
The project Hierarchy at this point should look like the one in the figure.
Go to the AF-1501 FPGA Driver under the FPGA Target on your project. Select the AF-1501 FPGA driver and right-click it. Select Compile to compile the FPGA driver.
Allow some time for the code to compile.
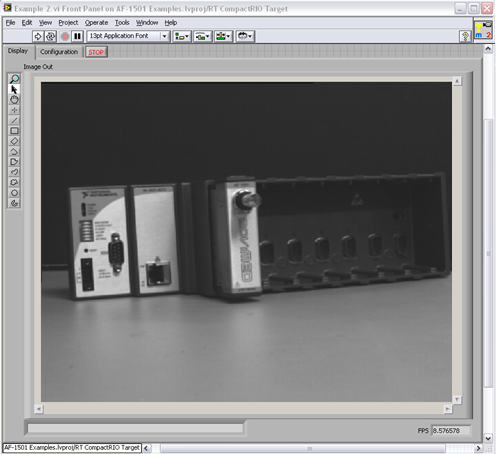
Once the compilation is done go to the Examples folder in your project at the RT level. Select Example 2.
Connect an analog camera source to the AF-1501 and clicking the Run Arrow should show a video acquired from the AF-1501 frame grabber module.

Example code from the Example Code Exchange in the NI Community is licensed with the MIT license.
