Overview
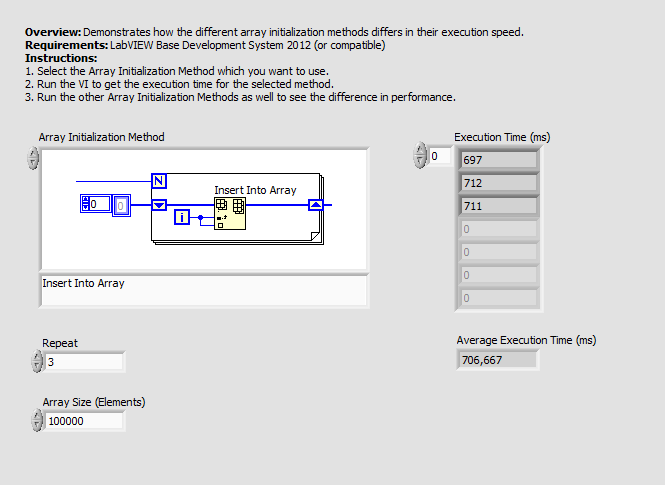
This example builds an ascending array of integers. Depending on the user's selection, it will use one out of three different methods to do so. It will also record the average time this process takes over a specified number of attempts.
Description
There are three main ways to declare and initialize an array in LabVIEW.
- Use Initialize Array and Replace Array Subset
- Use Build Array
- Use Insert Into Array
Initializing an array first and then replacing its elements is by far the fastest method. This is because LabVIEW allocates all the necessary memory at once as opposed to rearranging memory as the array grows in size. It took my computer approximately 10 milliseconds to initialize an ascending array of one million elements.
The second best method by far is using Build Array. To create that same array using Build Array, it takes approximately 200 milliseconds.
The slowest way is to use Insert Into Array. To use this method and create the same array, it takes an average of over 10 minutes!
It is important to note that sometimes it is impossible to use the faster methods due to limitations of your application. For example, if you don't know the length of your array ahead of time, you can't use the first method. One limitation of Build Array is that you can only add elements to the beginning or end. Sometimes, the only way you can accomplish your goal is to use Insert Into Array.
Requirements
Software
- LabVIEW Base Development System 2012 (or compatible)
- If running in a Real-Time context, you will need the LabVIEW Real-Time Module 2012 (or compatible)
Hardware
- No hardware is necessary to use this example VI
Steps to Implement or Execute Code
- Download and open the attached file
- Run the program
Additional Information or References


**The code for this example has been edited to meet the new Community Example Style Guidelines. The edited copy is marked with the text ‘NIVerified’. Read here for more information about the new Example Guidelines and Community Platform.**