Difference Map in NI Picture Quality Analysis (PQA)
- Subscribe to RSS Feed
- Mark as New
- Mark as Read
- Bookmark
- Subscribe
- Printer Friendly Page
- Report to a Moderator
Code and Documents
Attachment
What is a Difference Map?
Visually detecting the difference between a reference image/stream and a test stream can be difficult as some times the difference effects a small area or the difference is minute. One handy tool that is useful for visually detecting this is a difference map: subtract the test image from the reference image so that only the error stands out.
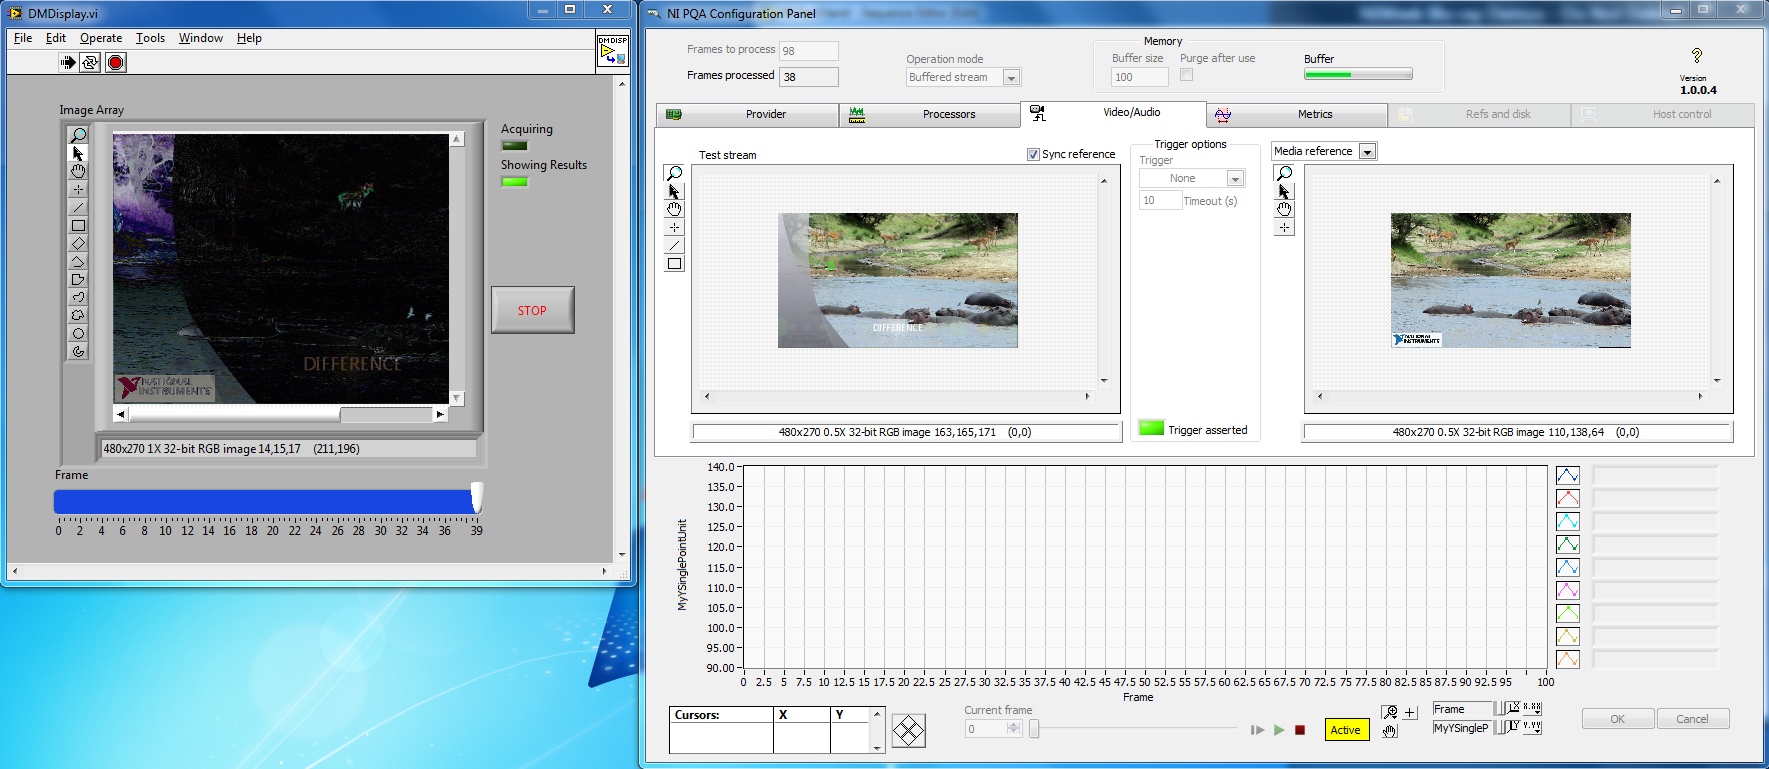
Figure 1 - Difference Map, a User Processor being used in NI PQA
The Picture Quality Analysis software has different processors you can choose to process on the incoming stream, one of which is a User Processor. Using the User Processor framework, it is possible to implement an algorithm that shows the Difference Map in real-time, then allows you to review the results after the acquisition of the stream. The learning experience is very different for using and developing this kind of processor. For the purpose of explanation, I will divide this example walk through into two section: 1. Using the Difference Map Processor and 2. Developing the Difference Map Processor
Using the Difference Map Processor:
The first step to understanding the Difference Map is to use it. This section will cover integrating the pre-made processor in PQA. To understand how it was made, go the next section: Developing the Difference Map Processor.
Software Requirements:
TestStand 2010
NI PQA 1.0
LabVIEW Run-time Engine 2009
Steps:
- 1. Unzip PQA Difference Map User Processor.zip into the C:\Users\Public\Documents\ directory.
- 2. Open the TestStand sequence entitled PQA Difference Map.seq
- 3. Login to TS, click on the NI PQA step, and choose the Configure NI PQA...
- 4. (Optional) Things to note (dependencies):
- 1. In the Providers Tab, the provider chosen is an AVI named hippoDifference.avi. More information on this below.
- 2. In the Processors Tab, the processor chosen is the User Processor named DifferenceMap.vi. More information on this below.
- 3. In the Refs and Disks Tab, the media ref stream is to Hippo 480x270 100f AV.bin. This binary file comes with PQA and is a binary file of the avi file of the same name in the same directory.
- 5. Move the PQA window to one side of the screen to make room for the Difference Map pop up.
- 6. Hit Run.
Developing the Difference Map Processor
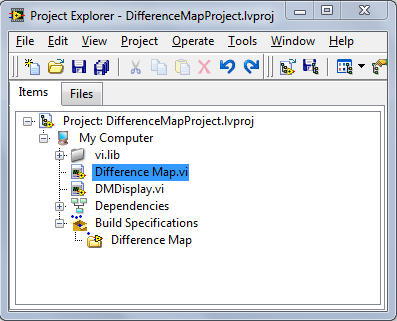
Figure 2 - Difference Map Project used to create the user processor. Note vi.lib has been dragged from dependencies (see note below) and the DLL Build Specification
Software Requirements:
TestStand 2010
NI PQA 1.0
LabVIEW 2009
Note: Developing processors for PQA requires LV 2009 because NI PQA 1.0 requires the LabVIEW 2009 Run-time Engine. For more information on this, open the User Processor Template that ships with NI PQA.
hippoDifference.avi - Creating video content for the “test” stream:
In order to show off differences, a close but ultimately different stream has to be created. Windows Movie Maker proved to be a viable source for this. I chose to put an overlay and the word “DIFFERENCE” in the video although ultimately the WMM’s encoding of the video proved to have plenty of differences from pixel to pixel:
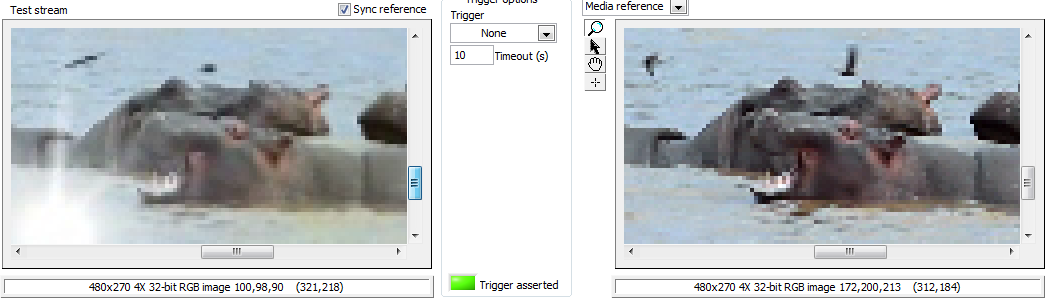
Figure 3 - Zoomed in look showing the differences between reference stream and "test" stream created using Windows Movie Maker
The Architecture:
In creating a straight forward processor and display, I found the major problem was that PQA’s buffer would overflow during run-time. By adding in some timing benchmarking, I found that displaying the image would some sometimes take upwards of 65 ms. With a 60 Hz framerate, I have 1/60th (~16 ms) of a second to acquire, process, and accomplish everything else before the next frame starts the cycle all over again. Because of this I used a queuing architecture to move the image to another loop for display.
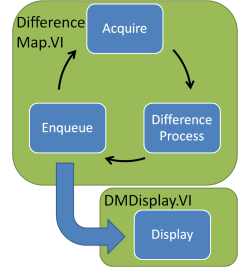
Figure 4 - Architecture of Difference Map User Processor
This allowed PQA to execute all the processing in 4-6 ms on a 6 core machine.
DifferenceMap.VI
This VI houses the differencing algorithm and was started by using the PQA User Processor template. The entire algorithm is composed of Vision steps including Create IMAQ Image, duplicate, and absolute difference. Duplicating the image was a workaround to get an image of the right size. The most important part of the algorithm is the Absolute Difference:
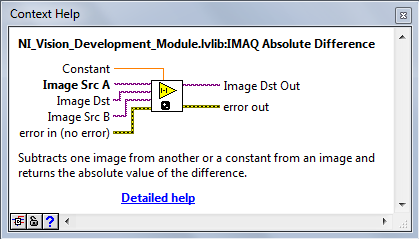
Figure 5 - Absolute Difference: the heart of the Difference Map algorithm
One potential stumbling block is to use just the Difference function. If the pixel from the test image was a higher value than the reference, then the subtraction would result in a negative value and still show up as a black, in other words perfect, pixel.
Dynamically loading the DMDisplay.VI is important because the idea is to initialize the VI, have it display images after they come in, and keep the display showing with all of the images after PQA has run. On the first frame, I dynamically called DMDisplay.VI, created a queue, and saved a reference to the queue for subsequent calls of the processor using a feedback node.
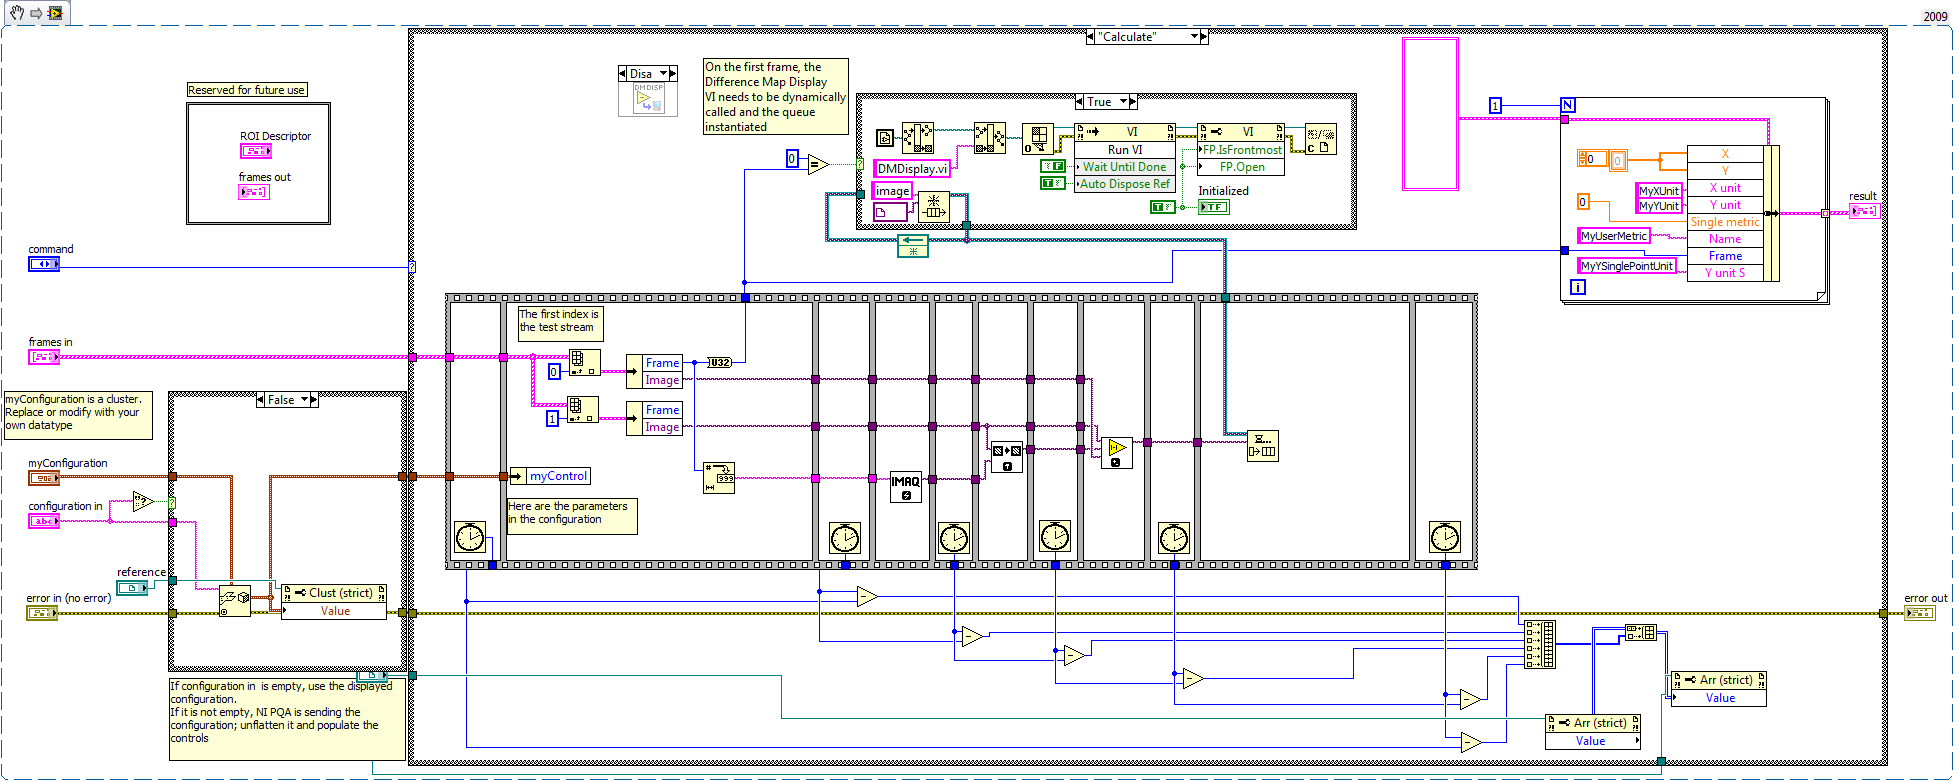
Figure 6 - Snippet of the DifferenceMap.VI block diagram. Not on the first frame, the queue is obtained and the DMDisplay.VI dynamically called
Lastly, when PQA has finished acquiring the configured number of frames, we need to ensure all of the images have made it out of the queue and into DMDisplay.VI before closing.
DMDisplay.VI
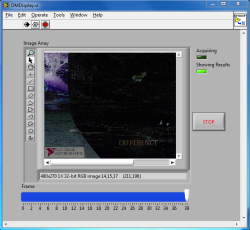
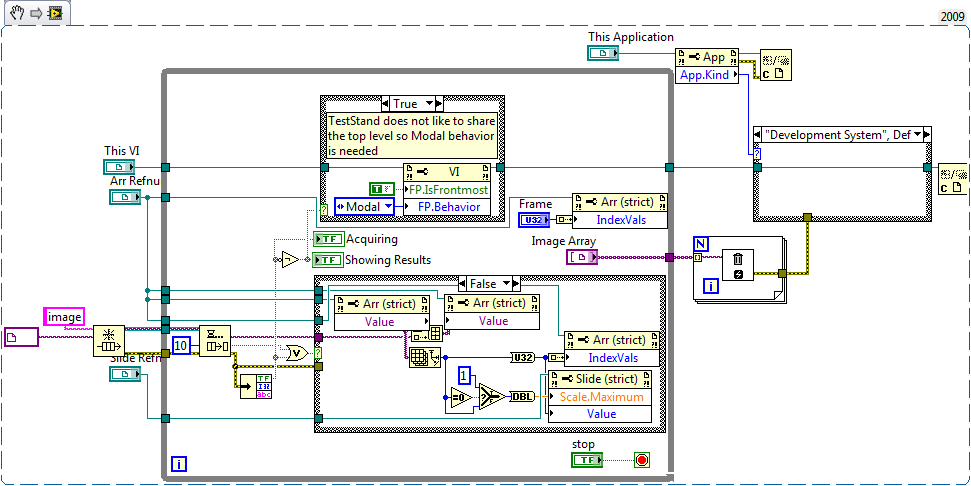
Figure 7 - Front Panel and Block Diagram of DMDisplay.VI. Please note that turning the BD into a snippet caused the references to look different (and confusing)
Recall that this VI starts running when PQA begins executing and is meant to run in a parallel process. To begin, obtain a queue by the same name ("image"). During the execution of the PQA acquisition, the loop will acquire any images available and store them in an array. It also causes the array to show the latest one so that during execution, the most recent image will be shown. Due to the fact that TestStand or PQA defaults to being on top, the VI is brought to the front and put into Modal front panel behavior. This perhaps is not a best case practice but works for this application. Lastly, when the stop button gets pushed, the references to the images get cleaned up and, if running in PQA (not LV development environment), the window closes.
Building into DLL
In order to use this User Processor in PQA, it needs to built as a DLL Build Specification, as noted in the User Processor template. One potential hang up is the Vision dependencies needed for the DLL to work in PQA properly.
Dependencies
Once I had finished using all the Vision VI’s I would in the end, I dragged the Dependencies folder up so I could include it in the DLL Build Spec as “Always Included”. This immediately regenerated a new Dependencies folder with Vision VI’s that are not used, so ignore them. Even though I did not include the extraneous dependencies after the original move, there are many dependencies in the folder included which are not needed. These extra files made the DLL 8 MB in size while it could be substantially smaller.
Once the DLL is built, test it in PQA and it will either keep reloading (you can detach the VI if this goes into a loop) or work. Every time it did not work I had either forgotten to include something in the build spec or loaded the project up in a later version of LabVIEW (reminder: source control).
Conclusion:
The best of luck and let me know if you have any questions! It is my no means trivial but I found it to be the right kind of challenging.
National Instruments
Applications Engineer
Example code from the Example Code Exchange in the NI Community is licensed with the MIT license.
- Mark as Read
- Mark as New
- Bookmark
- Permalink
- Report to a Moderator
Wondering if this could be simplified a little - use an Asynchronous launch of the display vi and pass it the reference to the image created once - saves time re-creating destination images since at 60Hz, your eyes probably won't take it in anyway - the display vi turns in to a while loop with a image display control in it.
Just a thought.
Thanks
Sacha
