Overview
This VI is a very simple bit of example code that uses a task created in Measurement & Automation Explorer (MAX) and acquires data.
Description
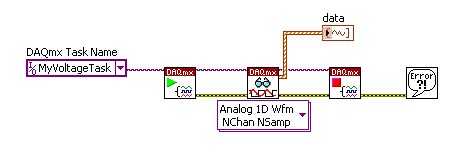
Tasks in MAX can be used in LabVIEW very simply. You can either drag a task from MAX straight into your block diagram or you can place a Task Constant from the functions palette. The Task Constant can be found under Measurement I/O»NI-DAQmx. From here all you need to do for an acquisition task is connect the task to a DAQmx Start VI and then to a DAQmx Read VI followed by a DAQmx Stop VI.
Performing a continuous read would require the use of a while loop with a stop condition around the DAQmx Read VI.
There are benefits of using a task from MAX instead of using a DAQ Assistant
- You can control when the task starts and stops.
- You can easily use the same channel setup in multiple instances/VIs
- You can edit some aspects of the task for a particular instance/VI without changing the setup of the task.
- There are also benefits of using a task from MAX instead of setting up your task completely in LabVIEW
- You can set up multiple channels, scales, timing and triggers outside of LabVIEW, cleaning up your code.
- It is easier to port task information between different VIs.
Requirements to Run
Software
- LabVIEW 8.2 or compatible
- NI-DAQmx 8.3 or compatible
Hardware
- Most compatible NI DAQ devices, or simulated devices.
Steps to Implement or Execute Code
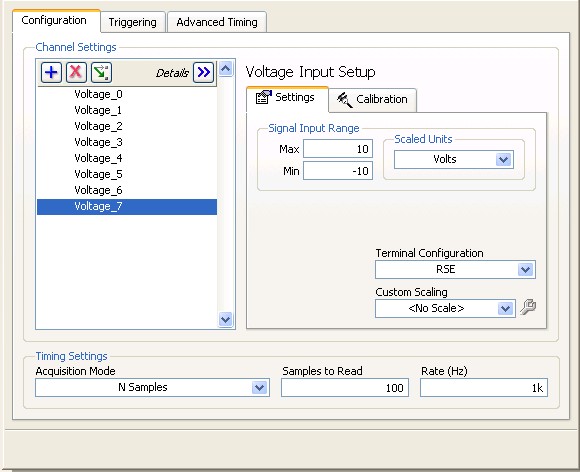
To create a Task in MAX:
- Under My System, right click on Data Neighborhood and select “Create new…”
- Select “NI DAQmx Task” and press “Next”
- Select the measurement type for the task
- Select the physical channel(s) to add to the task
- Name your task and select Finish
To implement your task in your LabVIEW code:
- Select the correct name for your DAQmx task from the “task/channels in” constant of the Start DAQmx Task.vi
- Run
**This document has been updated to meet the current required format for the NI Code Exchange.**
