- Document History
- Subscribe to RSS Feed
- Mark as New
- Mark as Read
- Bookmark
- Subscribe
- Printer Friendly Page
- Report to a Moderator
- Subscribe to RSS Feed
- Mark as New
- Mark as Read
- Bookmark
- Subscribe
- Printer Friendly Page
- Report to a Moderator
This document explains how to get admin access on your cRIO-9068.
Power-on the cRIO-9068
Plug in power to your cRIO. The Power LED should illuminate indicating the cRIO has power. Plug in an Ethernet cable to port 1 of the cRIO and connect it to the network. The activity light should illuminate or flash indicating the cRIO is connected on the network.
Configure the cRIO-9068
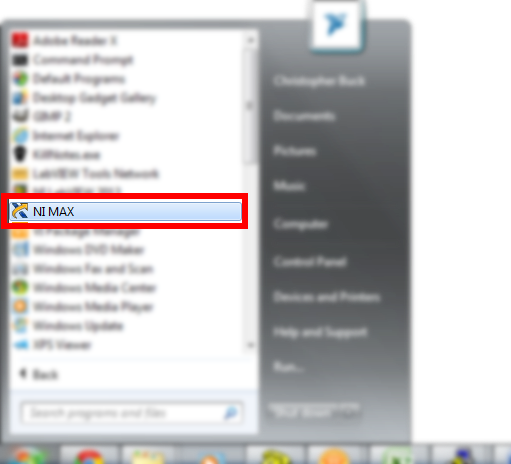
Now that your cRIO is connected to the network, open NI Measurement and Automation Explorer (MAX).
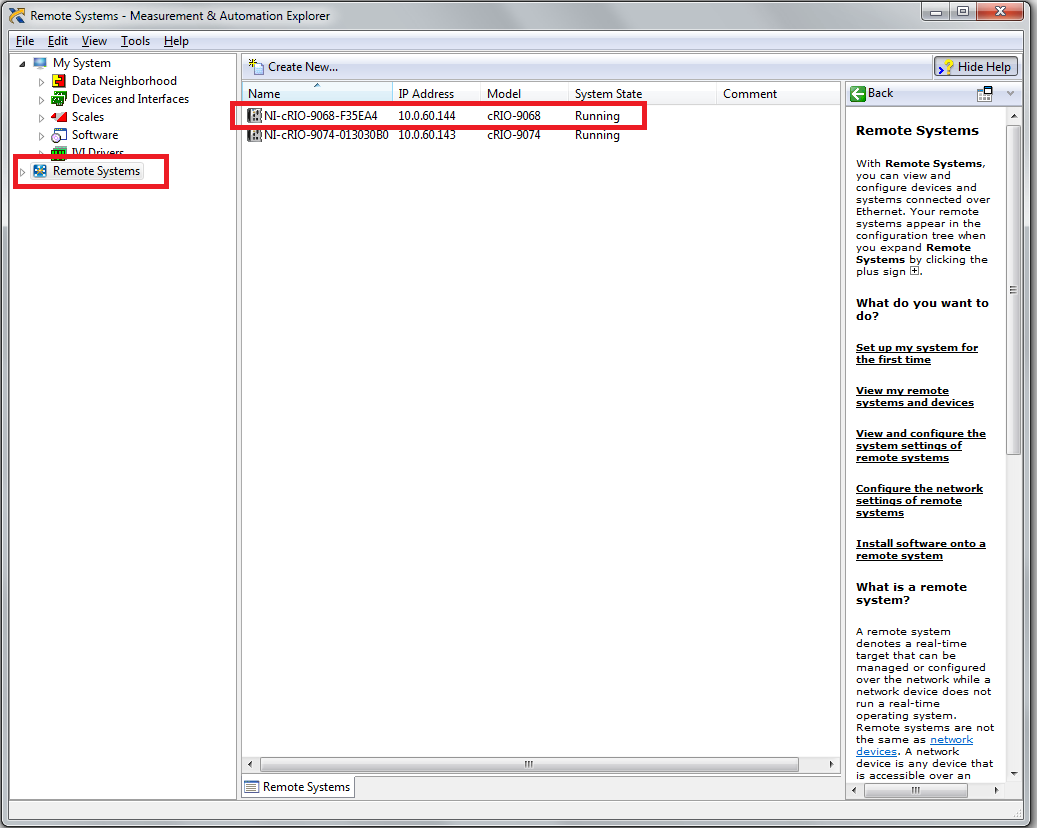
In MAX, select “Remote Systems” from the left navigation pane to scan for remote systems. Find your device in the system list and note the device IP Address.
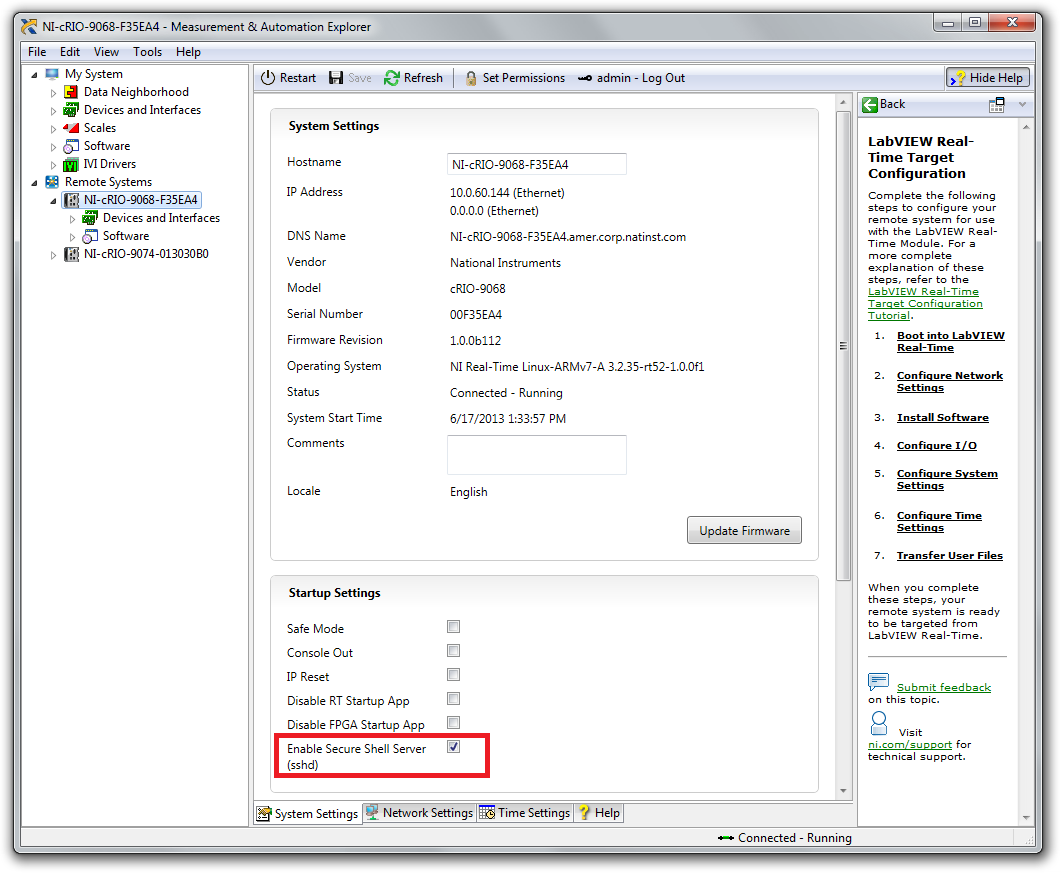
We will obtain shell access to the cRIO-9068 via SSH which is disabled by default for security reasons. Open the System Settings of the cRIO by selecting the device under “Remote Systems” in the left navigation pane. Select the option titled “Enable Secure Shell Server (sshd)” then save the configuration and restart the cRIO.
Change the administrator password
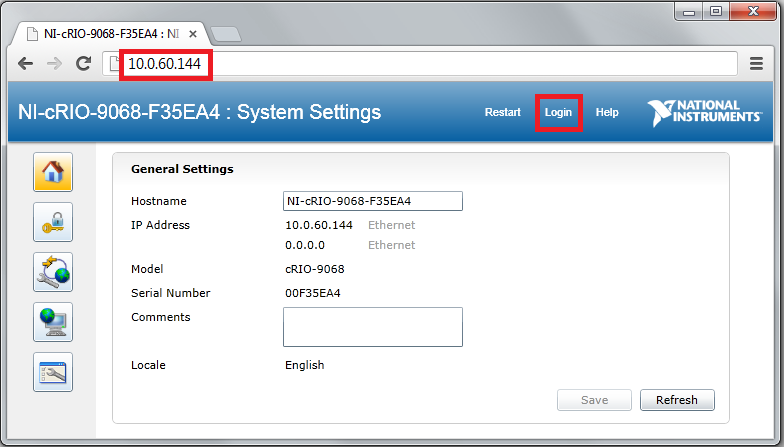
Changing the password for the admin user is strongly recommended but not required. In this tutorial we will continue with this step. After the cRIO has rebooted, enter the IP address listed in MAX to a web browser to navigate to the web configuration utility. Then select “Login” on at the upper right of the screen. Log in with the username “admin” and a blank password.
Select “Security Configuration” button on the left.

With the “admin” user highlighted in the list on the left, select the “Change Password” button and enter a new password. You will use this new password when logging in via SSH.
Connect to the cRIO-9068
Now the SSH server is enabled on the cRIO target. To connect to it we will need a SSH client application. This tutorial uses a popular open-source SSH client called PuTTY. However, other SSH clients (eg. openssh or Terminal on Mac OSX) may be used in a similar manner. Open PuTTY and enter the IP address of the cRIO we determined from MAX as the destination we want to connect to.
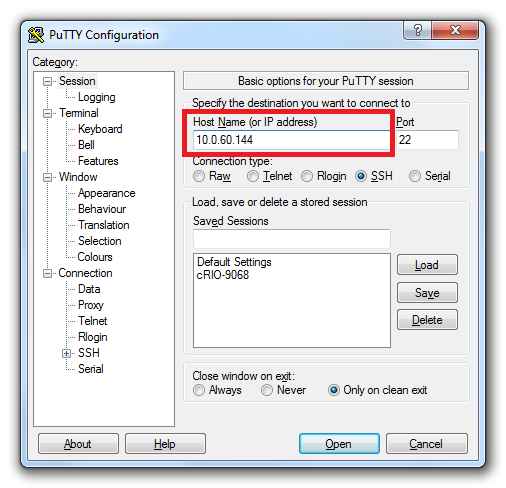
The rest of the default settings will be sufficient. Click the Open button to open the connection. When prompted, login as “admin” using the new password you provided earlier. If you are successful, you should see the prompt similar to:
admin@Device_Name:~#
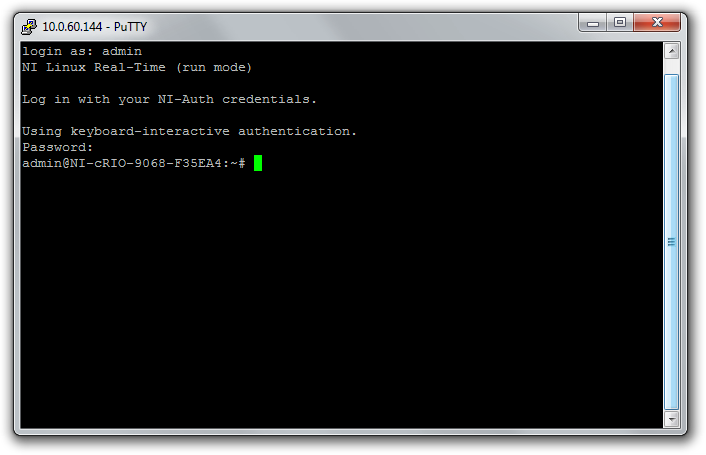
You now have superuser SSH access to the NI Linux Real-Time target.
Also note that it is possible to get non superuser access to the target if you create more non-administrative users through the web interface.
- Mark as Read
- Mark as New
- Bookmark
- Permalink
- Report to a Moderator
The myRIO is a NI Linux Real-Time target, so all of the same items in this article apply to it as well.
