ni.com is currently experiencing issues.
Support teams are actively working on the resolution.
ni.com is currently experiencing issues.
Support teams are actively working on the resolution.
12-12-2013 04:48 AM
 | This document was created for the myRIO Balancing Robot Project https://decibel.ni.com/content/groups/myrio-balancing-robot |  |
The myBOT is alive, now it's your turn to do exciting projects with it!
This document describes where you should start if you're thinking about building your own myBOT.
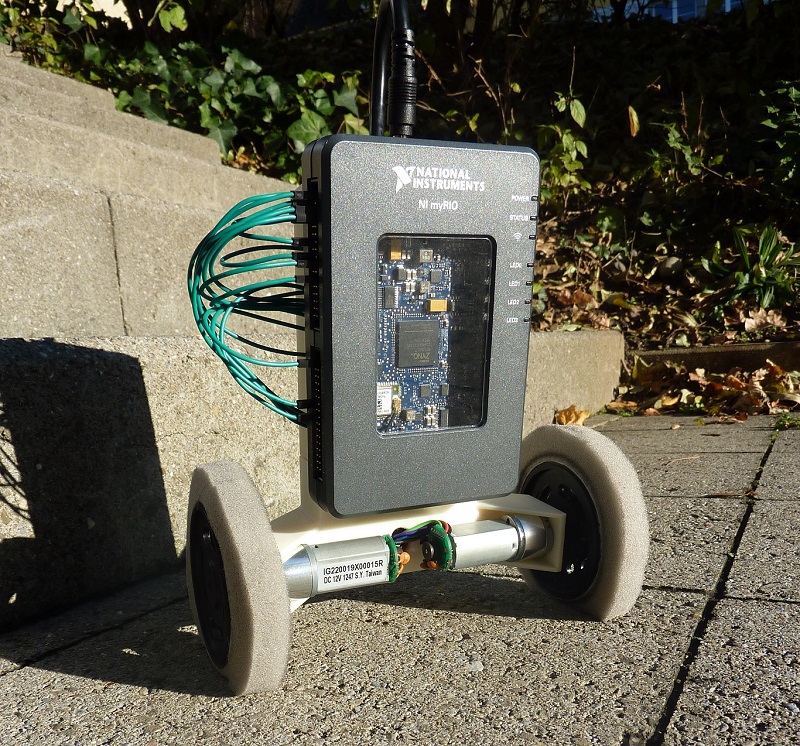
![]()
The Mathematical Model used for the myBOT is discussed in the attached "myBOT_BachelorThesis_AdrianSchmid.pdf", Chapter 4.
For the time being this document is only available in German Language.
There are two ways to implement the myBOT in Hardware.
At the end your myBOT should look similar to those two guys.
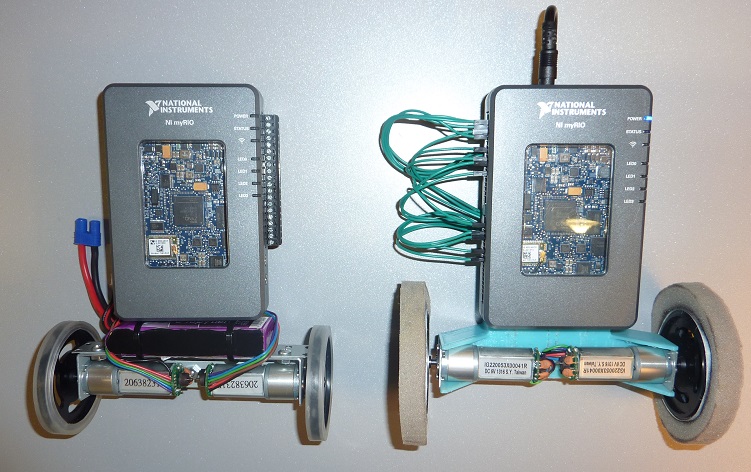
the left one is done using the Digilent parts (uncabled), the right one is done using the 3D printable parts.
CAD files that can be used to 3D print the myBOT are attached. (myBOT-CAD.zip)
The folder contains CAD files for
- the whole myBOT (myBOT.stp)
- the chassis (myBOT-Chassis.stp)
- the cover (myBOT-Cover.stp)
As well as the 'ready-to-print' *.stl files for both the chassis and the cover. (myBOT-Chassis.stl and myBOT-Cover.stl)
To build your bot you have to 3D print both, the "Chassis" and the "Cover".
The 3D printable myBOT has been developed by a group of students at TU-Darmstadt.
The myBOT on the picture on top has been done using the 3D printable housing.
Your 3D Prints should look something like:

Attention:
The CAD files attached only work with the 1:19 gear ration motors. If you wish to work with 1:53 ration, you should increase the gap between the two motors by 10mm. Otherwise the motors won't fit.
Also the wholes for the motor cables and the myRIO Power cables are a bit tight. To fix this you can use a rasp on your 3D prints (as I did) or change the CAD parts a bit before you print them.
If you do so: Please upload the CAD files to the community, so others can benefit from your work! Thanks.
Note:
The Parts on the Picture above are printed on a "Dimension SST 1200es". A good option is to get your parts at http://www.teilefabrik.de/ . Ask for the "Dimension SST 1200es".
Additionally to the two printable parts you need some Digilent parts for your myBOT.
| Nr. | Name | Link | Pieces |
|---|---|---|---|
| 1 | Motor/Gearbox, 1:19 Ratio | https://www.digilentinc.com/Products/Detail.cfm?NavPath=2,403,625&Prod=MT-MOTOR | 2 |
| 2 | Wheel Kit (pair) | https://www.digilentinc.com/Products/Detail.cfm?NavPath=2,403,621&Prod=MT-WHEELKIT | 2 |
| 3 | PmodDHB1 - Dual H-Bridge | https://www.digilentinc.com/Products/Detail.cfm?NavPath=2,401,1163&Prod=PMOD-DHB1 | 1 |
| 4 | PmodGYRO 3-Axis Digital Gyroscope | https://www.digilentinc.com/Products/Detail.cfm?NavPath=2,401,937&Prod=PMOD-GYRO | 1 |
| 5 | LiPo Akku, 11.1V, 1300mAh | http://www.conrad.ch/ce/de/product/239507/Hacker-LiPo-Akku-111-V-1300-mAh-25-C-Stecksystem-EC3-XH | 1 |
That's it. Well, you need some more small things. A bit of foam to build some soft tires for the myBOT and some cables to do the cabling stuff.
The other solution is to build the myBOT from Digilent parts. Please refer to https://decibel.ni.com/content/docs/DOC-30571 for the building instructions.
The Scheme for the Cabling of the myBOT is attached (myBOT-Wiring.ms13).
Attached is a fully functional myBOT Software version "myBOT - v1.zip". Connect your myRIO to your computer, and deploy the main vi "myBOT.vi" to your BOT. You're ready to go!
Attention: The attached version of the SW is prepared for the 1:53 ratio motors. If you're about to build your myBOT with the 1:19 ratio you'll have to change some constants.
If you're unsure about building the myBOT, start with a simulation first. The attached "myBOT-Simulate-v04.zip" contains a LabVIEW project with all needed VI's for the Simulation. The project is compiled for the use with LabVIEW 2013 myRIO Edition.
For more information on the Simulaton refer to https://decibel.ni.com/content/docs/DOC-32547
Here's a video of the simulated myBOT in action:
For more information on the myBOT check out the NI Community Group https://decibel.ni.com/content/groups/myrio-balancing-robot
and the YouTube Channel https://www.youtube.com/channel/UCQJmgKWj_vl9Boz_S6kdi8A
For more information on the myRIO check out http://www.ni.com/myrio
Have Fun!
06-21-2017 09:37 AM
exc , i have a problem with your codes, can u explain to me , see that file please, i don't understand the number (255) in that codes, can you tell me about the unit of Gyro and that number , please
05-05-2022 12:15 AM

Following in your footsteps, I also made a myrio balance car.

