Arduino as Low-Cost Wii Nunchuck Interface
- Subscribe to RSS Feed
- Mark as New
- Mark as Read
- Bookmark
- Subscribe
- Printer Friendly Page
- Report to a Moderator
Code and Documents
Attachment
Overview
This code will allow you to get feedback from a Wii Nunchuck using an Arduino as a low-cost I2C interface.
Description
Wii Chucks are plentiful and have many nice features such as a joystick, buttons and built in 3-axis accelerometer. The attached code will allow you to interface with a white Wii Nunchuck from LabVIEW without the need for the additional overhead used in the full Wii Controller library as given here.
Steps to Implement or Execute Code
- Install the LabVIEW Interface for Arduino for your version of LabVIEW (available from the VI Package Manager).
- Connect an Arduino to your computer and ensure the appropriate driver is loaded.
- Connect the Chuck to your Arduino, either by using one of the many adapter boards available or direct wiring.
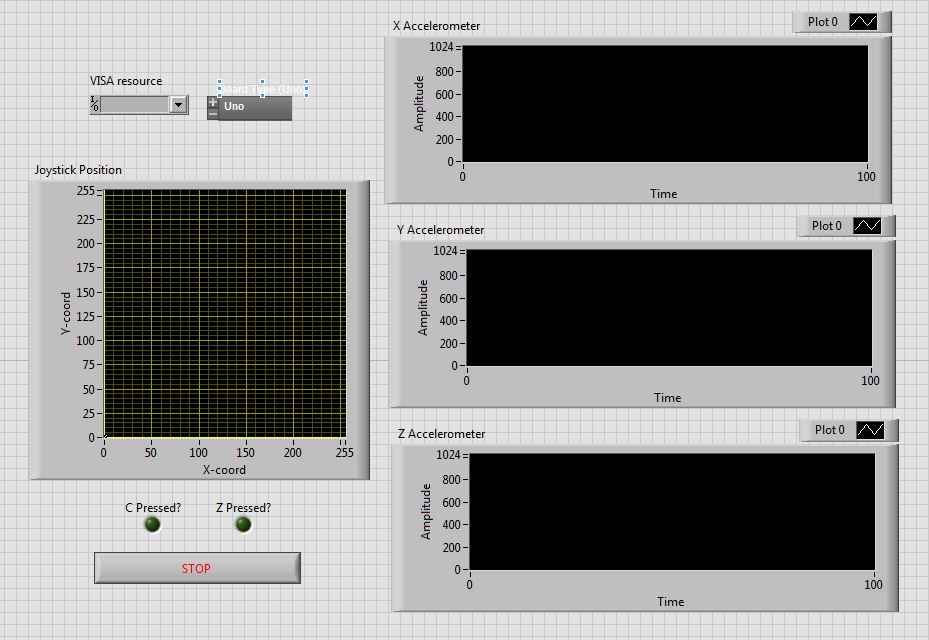
- Open the GenericRead.vi and specify the appropriate VISA resources and Arduino board type.
- Run GenericRead.vi and observe the displayed output.
Requirements
Software
LabVIEW 2011 or newer
LabVIEW Interface for Arduino (LIFA)
Hardware
Arduino Uno, Mega 2560 or Duemilanove
White Wii Nunchuck (If using a black Wii Nunchuck, the initialization routine must reportedly be changed.)
Wii Nunchuck connector breakout board (optional)
Additional Images or Video
Example code from the Example Code Exchange in the NI Community is licensed with the MIT license.
