- Document History
- Subscribe to RSS Feed
- Mark as New
- Mark as Read
- Bookmark
- Subscribe
- Printer Friendly Page
- Report to a Moderator
- Subscribe to RSS Feed
- Mark as New
- Mark as Read
- Bookmark
- Subscribe
- Printer Friendly Page
- Report to a Moderator
myLieDetector: Low-cost Polygraph Testing
myLieDetector
A low-cost signal analyzer which can measure the human bodys vitals to tell if you are lying
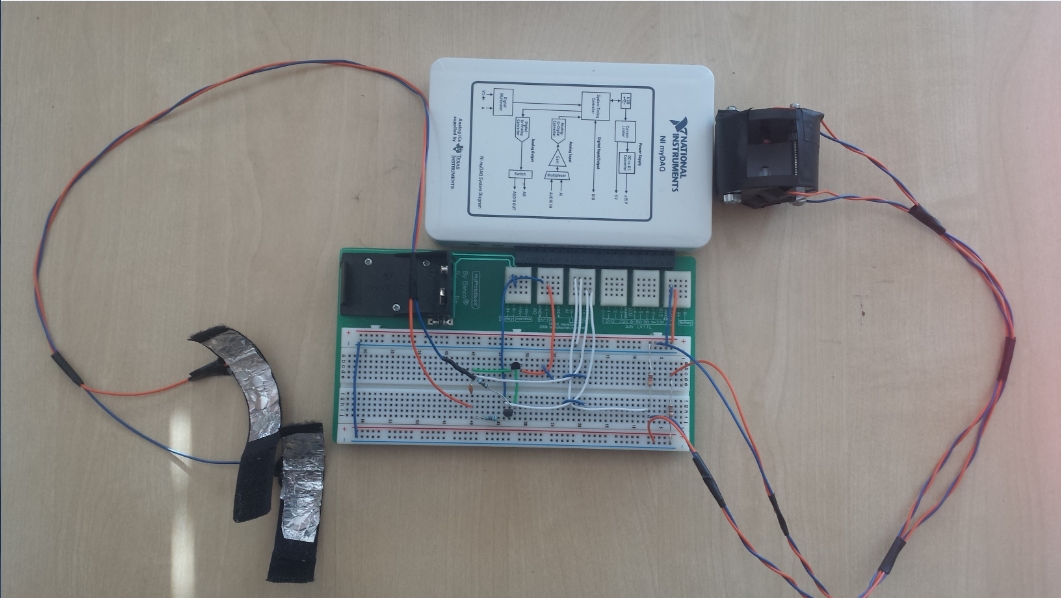
Figure1: NI's myDAQ connected up to the finger pads and Heart-Rate monitor
Project Summary
The "myLieDetector" measures and records several physiological indices such as blood pressure, pulse rate and skin conductivity, whilst a test subject is asked a series of questions. The subject's answers will produce physiological responses that can be differentiated when someone is lying or telling the truth.
The system utilises NI myDAQ to aquire signals from various biosensors, which are then analysed using LabVIEW to interpret and display the data. More specifically, the sensor data is processed to discern the heart-rate and perspiration of the human body.
History
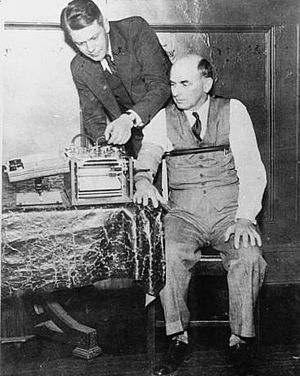
The polygraph ("LieDetector") was invented in 1921 by John Augustus Larson, a medical student at the University of California at Berkeley and a police officer of the Berkeley Police Department.The polygraph featured in the Encyclopædia Britannica list of greatest inventions - included in the list of inventions that "have had profound effects on human life for better or worse."
The efficacy of polygraphs is debated in the scientific community. In 2001, a significant fraction of the scientific community considered polygraphy to be pseudoscience. However, in 2002, a review by the National Academies of Science found that when used on people who are untrained in countermeasures, polygraph testing can discriminate lying from truth telling at rates well above chance.
In many countries, polygraphs are used as an interrogation tool for criminal suspects, or to interview candidates for sensitive public/private sector employment. US law enforcement and federal government agencies (including the FBI and CIA, and many police departments such as the LAPD) use polygraph examinations to interrogate suspects and screen new employees. Within the US federal government, a polygraph examination is also referred to as a psychophysiological detection of deception (PDD) examination.
Additionally, in the UK, polygraph tests are used by police and probation officers, when interviewing high-risk criminals and sex-offenders once released from prison.
Polygraph examiners, or polygraphers, are licensed or regulated in some jurisdictions. Agencies, such as the American Polygraph Association and the British Polygraph Association, aim to establish standards of moral, ethical and professional conduct in the polygraph field, though they do not certify individual examiners.
Lie Detection Process
A complete polygraph examination consists of three separate and distinct phases. These are:
- Pre-Test Phase
- In-Test Phase
- Post-Test Phase
1. Pre-Test Phase
During this first phase, the examiner will:
- Inform the examinee of the specific issue that is being investigated;
- Advise the examinee of his or her constitutional rights, of their right to an attorney and of the voluntary action of submitting to a polygraph examination;
- Complete the necessary documentation;
- Provide the examinee with a detailed explanation of the polygraph instrumentation with its components and how these work;
- Answer any questions that the examinee may have;
- Obtain the examinee's version of the facts regarding the specific issue under investigation;
- Formulate and review with the examinee all the questions that will be asked of him or her during the polygraph examination.
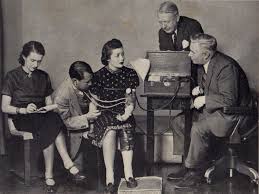
Before moving on to the in-test phase, the examiner will fasten various painless components to and around the examinee's body
2. In-Test Phase
The polygraph examination takes place during the In-test Phase (also known as the chart collection phase).
Once the examination is underway, the examiner will administer a minimum number of three separate tests each lasting approximately 5 minutes — and a maximum number of six tests — where the examinee's physiological data will be continuously collected, measured and recorded, onto polygraph charts, as he or she answers the set of questions that were formulated and reviewed during the pre-test phase.
The examinee will have a two-minute relaxation period between each test.
Upon completion of the in-test phase, the examiner will analyze, interpret and evaluate the examinee's physiological data collected during the polygraph examination, after which the examiner will form one of the following professional opinions:
|
3. Post-Test Phase
During this last phase, the examiner will give the examinee the result of the polygraph examination. If the physiological data recorded on the charts shows reactions on the part of the examinee to the relevant questions that were asked, he or she will be given the opportunity to explain these reactions.
Once the post-test phase is finished, the examiner will provide the client with a verbal report of the polygraph examination and its result. This will be followed, in a timely manner, by a written report containing a factual account of all the information developed during the polygraph procedure, as well as the examiner's professional opinion of the examination results based on the analysis, interpretation and evaluation of the polygraph data.
myLieDetector: The Hardware
The aim of the project was to build the system for as little money as possible in order to make it possible for anyone to build.
The main component of the project was the myDAQ - a compact, portable data acquisition system that allows users to measure and analyze signals anywhere, anytime. The myDAQ was combined with two sensing circuits, developed with the following componets:
- 4.7k Resistor
- 87k Resistor
- 0.01 uF Capasitor
- 2N3904 Transistor
- 2N3906 Transistor
- Velcro Strap
- 100k Resistor
- LDR
- LED
- 1100 and 180 ohm resistors.
You will also need some basic electrical cables and tools.
myLieDetector: Circuit Assembly
Sensing Circuit #1
The Heart-Rate monitor works by beaming light from an LED through the test subject's fingertip. A light detecting resistor (LDR) on the other side of finger monitors the drop in resistance each time the heart beats and sends blood round the body.
Sensing Circuit #2
The Perspiration monitor works by sending an electrical signal accross the skin of a test subject's finger. As a subject starts to feel anxious or guilty, they will begin to perspire. As this happens, the skin will be more conductive, creating a gradual drop in resistance.
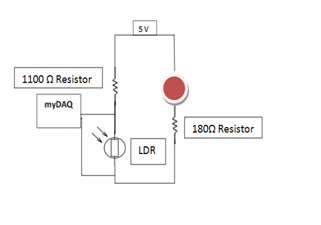
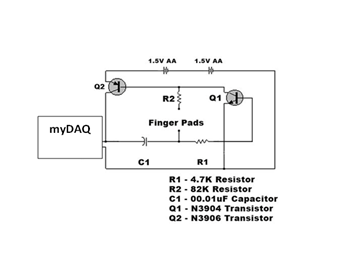
Figure2: Heart-rate monitor Figure3: Perpiration monitor
Please see the detailed guide for more information and a desciption on how to create the finger pads and Heart-Rate monitor box.
myLieDetector: The Code
You can download the myLieDetector, by downloading the zip file attached at the bottom of the page.
The code using the NI DAQmx driver API to set the data-acquisition parameters, before continiously streaming signals from the myDAQ over USB. Once the data is available in the software, simple processing begins. Data recieved from the Heart-Rate Monitor, is filtered to remove any noise. Peaks within the filtered signal are then counted up over extended periods in order to give accurate BPM. At the same time, changes in skin resistance
caused by perspiration are monitored.
Both the processed Heart-Rate and Perpiration signals are then logged to disk, enabling the data to be further reviewed incase the results of the test are inconclusive. I chose to use the tdms file to record my data, as it is capable of compact and fast data storage
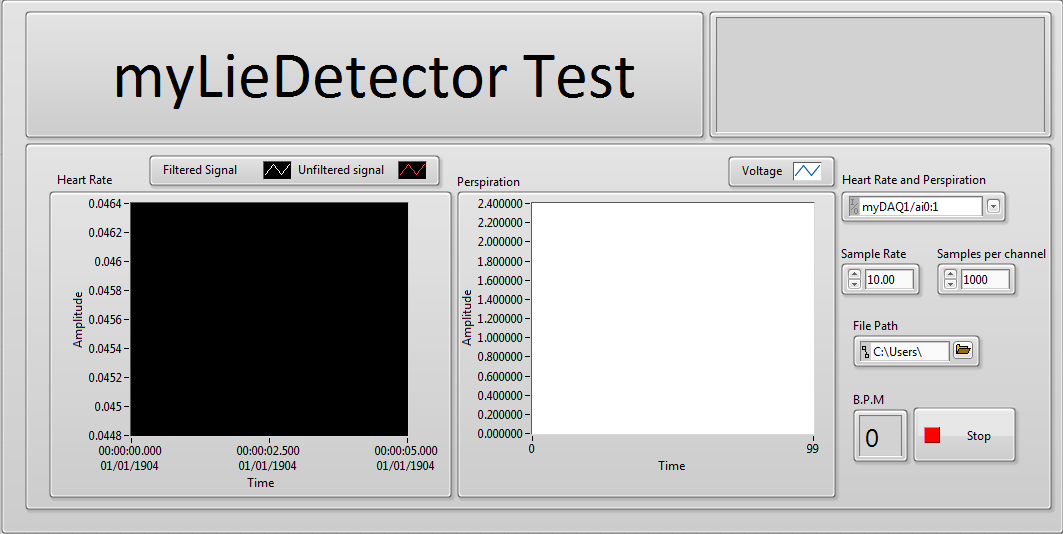 Figure 4:Front Panel of the LieDetector
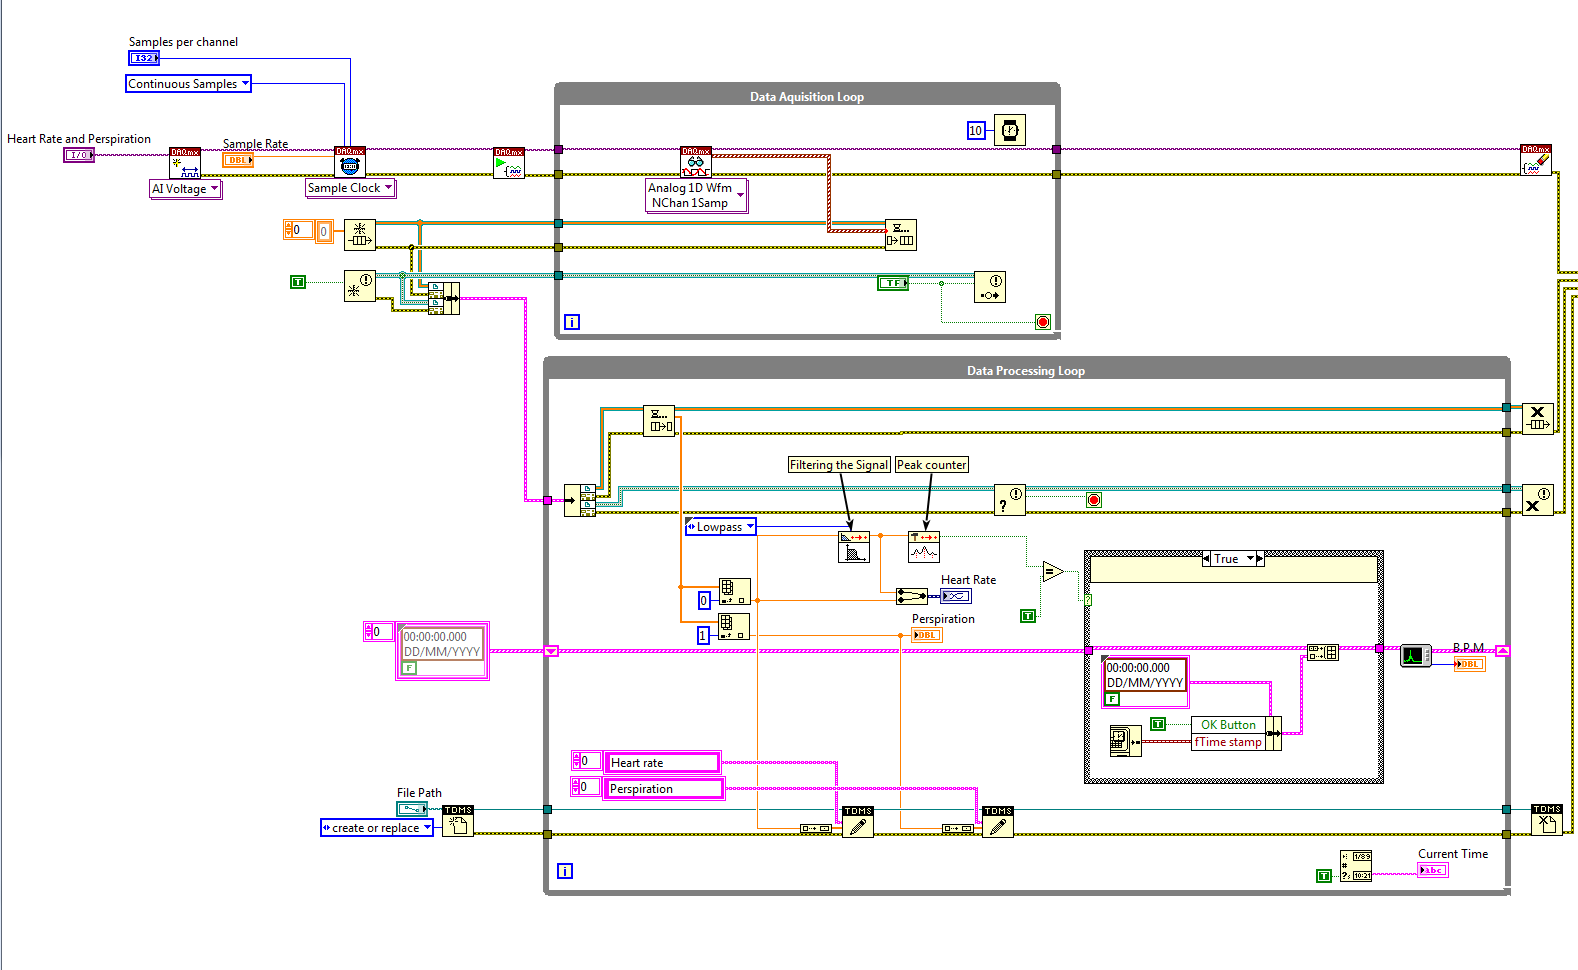 Figure5: Block Diagram of the LieDetector
Requirements
Software
- LabVIEW 2014
- DAQmx
Hardware
- myDAQ USB Device
- Electronic components described above
Useful Resources
Learn Measurement and Sensor Fundamentals
About the Developer
My name is Sebastian, I am an intern Applications Engineer at National Instruments. I am currently studying for a Masters in Electrical and Electronic Engineering at Cardiff University. I have a passion for really cool and fun technology projects.
I hope to contuine developing my LabVIEW developer skills by hopefully create some new awesome demos. I'll be sure to share them with the NI community.
