- Document History
- Subscribe to RSS Feed
- Mark as New
- Mark as Read
- Bookmark
- Subscribe
- Printer Friendly Page
- Report to a Moderator
- Subscribe to RSS Feed
- Mark as New
- Mark as Read
- Bookmark
- Subscribe
- Printer Friendly Page
- Report to a Moderator
LabWindows/CVI 2009 introduced the addition of a new custom progress bar for a more accurate visual representation of task advancement on the user interface. The custom progress bar control is loaded into an existing project as an instrument driver.
Adding a Custom Progress Bar for the User Interface:
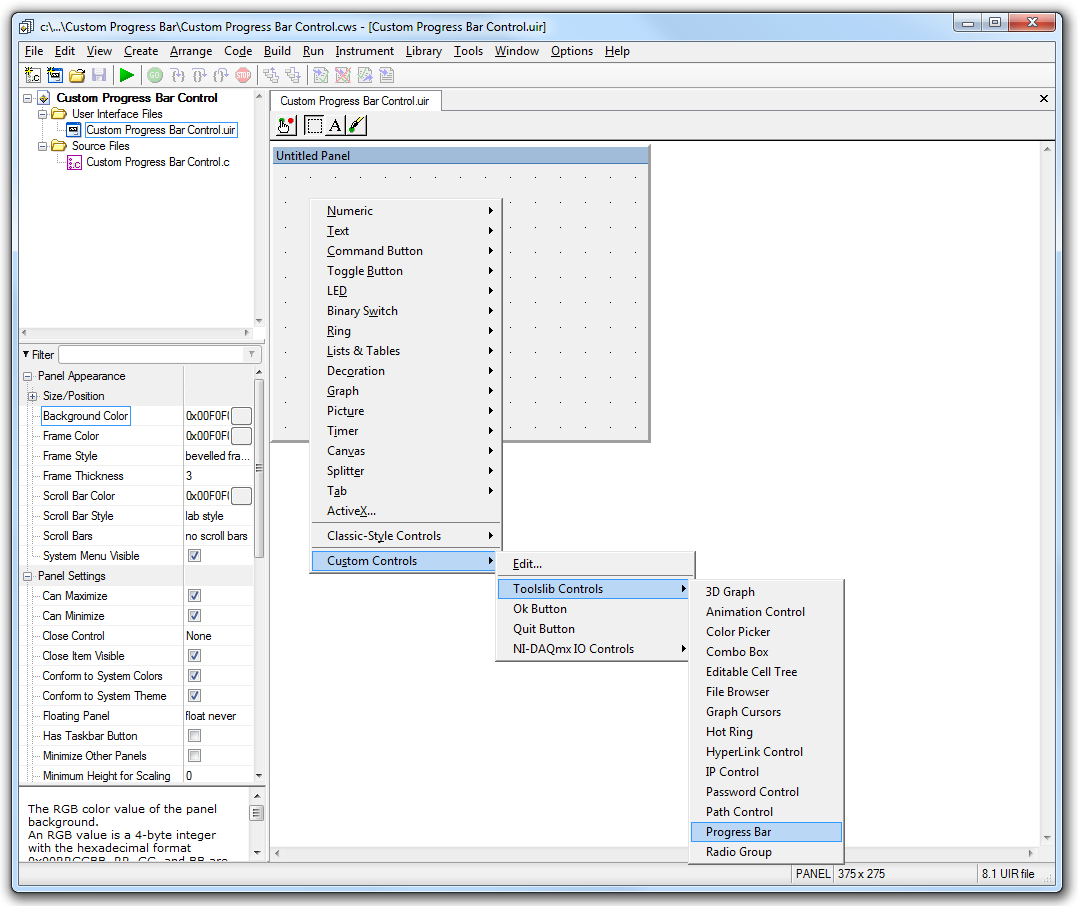
- You can add a cutom progress bar to the user interface by right-clicking on the panel and selecting Custom Controls»Toolslib Controls»Progress Bar.
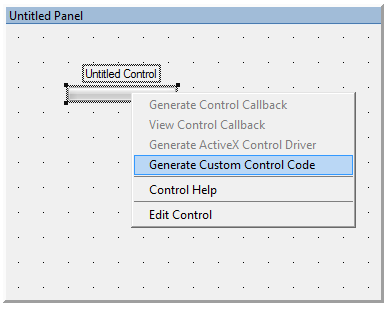
- You can then generate custom code to configure the progress bar control by right-clicking on the control and selecting Generate Custom Control Code.
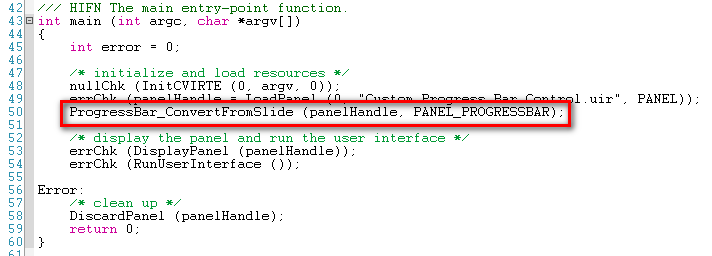
You will notice that LabWindows/CVI automatically generates code to convert and configure the custom progress bar.
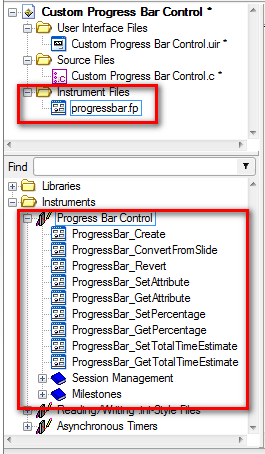
LabWindows/CVI will also add the progressbar.fp to your Workspace Instrument Files folder and includes needed Instruments under the Instruments Library.
You can set the position of the custom progress bar in two different ways:
- Percentage Value— Move the progress bar to the percentage value you specify.
- Milestones—Move the progress bar according to milestones you create at various percentage points along the progress bar. These milestones can represent several discrete sub-tasks that need to occur before the full task is completed.
There are three different modes that are available for specifying how to move the progress bar:
- Manual— Explicitly update the value of the progress bar with percentage values or milestones.
- Auto— Asynchronous and automatic movement according to estimated time, that you specify, for the task. The progress bar can also adjust the rate based on historic actual task completion times, without having to explicitly configure it. This is useful in situations where a task cannot be interrupted, and you still want to have a progress bar that advances gradually.
- Marquee— A shortened portion of the progress bar moves continuously, without a set position. This mode is intended to denote that a task is in progress, without indicating how far along it is.
Examining the Open Source Driver:
Like other custom controls, the custom progress bar driver also performs a secondary role as an extended example of using the UI library, therefore it's an open source driver. You can examine and debug this open source code, which is located in toolslib\custctrl\progressbar.c. To step through the source code, select Instrument»Edit and then click Attach and Edit Source.
Additional Resources:
LabWindows/CVI 2009 includes a shipping Example to show you how to get started with the Custom Progress Bar. You can find this shipping example in the new examples workspace. This particular example can be found in C:\Users\Public\Documents\National Instruments\CVI2009\samples\userint\custctrl\progressbar.
Additional Information on the Custom Progress Bar control is available on the progress Bar in the CVI Help under Tools Library»Progress Bar Control
National Instruments
LabVIEW Product Marketing
- Mark as Read
- Mark as New
- Bookmark
- Permalink
- Report to a Moderator
The LabWindows/CVI shipping example that uses the custom progress bar can be found here: C:\Users\Public\Documents\National Instruments\CVI2009\samples\userint\custctrl\progressbar.
National Instruments
LabVIEW Product Marketing
