-
NI Community
- Welcome & Announcements
-
Discussion Forums
- Most Active Software Boards
- Most Active Hardware Boards
-
Additional NI Product Boards
- Academic Hardware Products (myDAQ, myRIO)
- Automotive and Embedded Networks
- DAQExpress
- DASYLab
- Digital Multimeters (DMMs) and Precision DC Sources
- Driver Development Kit (DDK)
- Dynamic Signal Acquisition
- FOUNDATION Fieldbus
- High-Speed Digitizers
- Industrial Communications
- IF-RIO
- LabVIEW Communications System Design Suite
- LabVIEW Electrical Power Toolkit
- LabVIEW Embedded
- LabVIEW for LEGO MINDSTORMS and LabVIEW for Education
- LabVIEW MathScript RT Module
- LabVIEW Web UI Builder and Data Dashboard
- MATRIXx
- Hobbyist Toolkit
- Measure
- NI Package Manager (NIPM)
- Phase Matrix Products
- RF Measurement Devices
- SignalExpress
- Signal Generators
- Switch Hardware and Software
- USRP Software Radio
- NI ELVIS
- VeriStand
- NI VideoMASTER and NI AudioMASTER
- VirtualBench
- Volume License Manager and Automated Software Installation
- VXI and VME
- Wireless Sensor Networks
- PAtools
- Special Interest Boards
- Community Documents
- Example Programs
-
User Groups
-
Local User Groups (LUGs)
- Denver - ALARM
- Bay Area LabVIEW User Group
- British Columbia LabVIEW User Group Community
- Chicago LabVIEW User Group
- Egypt NI Chapter
- GUNS
- Houston Area LabVIEW Community
- LabVIEW - University of Applied Sciences Esslingen
- [IDLE] LabVIEW User Group Stuttgart
- LUGG - LabVIEW User Group at Goddard
- LUGNuts: LabVIEW User Group for Connecticut
- Madison LabVIEW User Group Community
- Mass Compilers
- Melbourne LabVIEW User Group
- Midlands LabVIEW User Group
- Milwaukee LabVIEW Community
- Minneapolis LabVIEW User Group
- CSLUG - Central South LabVIEW User Group (UK)
- Nebraska LabVIEW User Community
- New Zealand LabVIEW Users Group
- NI UK and Ireland LabVIEW User Group
- NOCLUG
- Orange County LabVIEW Community
- Ottawa and Montréal LabVIEW User Community
- Washington Community Group
- Phoenix LabVIEW User Group (PLUG)
- Politechnika Warszawska
- PolŚl
- Rutherford Appleton Laboratory
- Sacramento Area LabVIEW User Group
- San Diego LabVIEW Users
- Sheffield LabVIEW User Group
- South East Michigan LabVIEW User Group
- Stockholm LabVIEW User Group (STHLUG)
- Southern Ontario LabVIEW User Group Community
- SoWLUG (UK)
- Space Coast Area LabVIEW User Group
- Sydney User Group
- Top of Utah LabVIEW User Group
- Utahns Using TestStand (UUT)
- UVLabVIEW
- Western NY LabVIEW User Group
- Western PA LabVIEW Users
- Orlando LabVIEW User Group
- Aberdeen LabVIEW User Group (Maryland)
- Gainesville LabVIEW User Group
- LabVIEW Team Indonesia
- Ireland LabVIEW User Group Community
- Louisville KY LabView User Group
- NWUKLUG
- LVUG Hamburg
- LabVIEW User Group Munich
- LUGE - Rhône-Alpes et plus loin
- London LabVIEW User Group
- VeriStand: Romania Team
- DutLUG - Dutch LabVIEW Usergroup
- WaFL - Salt Lake City Utah USA
- Highland Rim LabVIEW User Group
- NOBLUG - North Of Britain LabVIEW User Group
- North Oakland County LabVIEW User Group
- Oregon LabVIEW User Group
- WUELUG - Würzburg LabVIEW User Group (DE)
- LabVIEW User Group Euregio
- Silesian LabVIEW User Group (PL)
- Indian LabVIEW Users Group (IndLUG)
- West Sweden LabVIEW User Group
- Advanced LabVIEW User Group Denmark
- Automated T&M User Group Denmark
- UKTAG – UK Test Automation Group
- Budapest LabVIEW User Group (BudLUG)
- South Sweden LabVIEW User Group
- GLA Summit - For all LabVIEW and TestStand Enthusiasts!
- Bangalore LUG (BlrLUG)
- Chennai LUG (CHNLUG)
- Hyderabad LUG (HydLUG)
- LUG of Kolkata & East India (EastLUG)
- Delhi NCR (NCRLUG)
- Montreal/Quebec LabVIEW User Group Community - QLUG
- Zero Mile LUG of Nagpur (ZMLUG)
- LabVIEW LATAM
- LabVIEW User Group Berlin
- WPAFB NI User Group
- Rhein-Main Local User Group (RMLUG)
- Huntsville Alabama LabVIEW User Group
- LabVIEW Vietnam
- [IDLE] ALVIN
- [IDLE] Barcelona LabVIEW Academic User Group
- [IDLE] The Boston LabVIEW User Group Community
- [IDLE] Brazil User Group
- [IDLE] Calgary LabVIEW User Group Community
- [IDLE] CLUG : Cambridge LabVIEW User Group (UK)
- [IDLE] CLUG - Charlotte LabVIEW User Group
- [IDLE] Central Texas LabVIEW User Community
- [IDLE] Cowtown G Slingers - Fort Worth LabVIEW User Group
- [IDLE] Dallas User Group Community
- [IDLE] Grupo de Usuarios LabVIEW - Chile
- [IDLE] Indianapolis User Group
- [IDLE] Israel LabVIEW User Group
- [IDLE] LA LabVIEW User Group
- [IDLE] LabVIEW User Group Kaernten
- [IDLE] LabVIEW User Group Steiermark
- [IDLE] தமிழினி
- Academic & University Groups
-
Special Interest Groups
- Actor Framework
- Biomedical User Group
- Certified LabVIEW Architects (CLAs)
- DIY LabVIEW Crew
- LabVIEW APIs
- LabVIEW Champions
- LabVIEW Development Best Practices
- LabVIEW Web Development
- NI Labs
- NI Linux Real-Time
- NI Tools Network Developer Center
- UI Interest Group
- VI Analyzer Enthusiasts
- [Archive] Multisim Custom Simulation Analyses and Instruments
- [Archive] NI Circuit Design Community
- [Archive] NI VeriStand Add-Ons
- [Archive] Reference Design Portal
- [Archive] Volume License Agreement Community
- 3D Vision
- Continuous Integration
- G#
- GDS(Goop Development Suite)
- GPU Computing
- Hardware Developers Community - NI sbRIO & SOM
- JKI State Machine Objects
- LabVIEW Architects Forum
- LabVIEW Channel Wires
- LabVIEW Cloud Toolkits
- Linux Users
- Unit Testing Group
- Distributed Control & Automation Framework (DCAF)
- User Group Resource Center
- User Group Advisory Council
- LabVIEW FPGA Developer Center
- AR Drone Toolkit for LabVIEW - LVH
- Driver Development Kit (DDK) Programmers
- Hidden Gems in vi.lib
- myRIO Balancing Robot
- ROS for LabVIEW(TM) Software
- LabVIEW Project Providers
- Power Electronics Development Center
- LabVIEW Digest Programming Challenges
- Python and NI
- LabVIEW Automotive Ethernet
- NI Web Technology Lead User Group
- QControl Enthusiasts
- Lab Software
- User Group Lead Network
- CMC Driver Framework
- JDP Science Tools
- LabVIEW in Finance
- Nonlinear Fitting
- Git User Group
- Test System Security
- Product Groups
- Partner Groups
-
Local User Groups (LUGs)
-
Idea Exchange
- Data Acquisition Idea Exchange
- DIAdem Idea Exchange
- LabVIEW Idea Exchange
- LabVIEW FPGA Idea Exchange
- LabVIEW Real-Time Idea Exchange
- LabWindows/CVI Idea Exchange
- Multisim and Ultiboard Idea Exchange
- NI Measurement Studio Idea Exchange
- NI Package Management Idea Exchange
- NI TestStand Idea Exchange
- PXI and Instrumentation Idea Exchange
- Vision Idea Exchange
- Additional NI Software Idea Exchange
- Blogs
- Events & Competitions
- Optimal+
- Regional Communities
- NI Partner Hub
-
 GerdW
GerdW
 on:
Event handling Problem
-
 Thoric
 on:
create a (right click) menu in a picture
-
 cacalderon
on:
LabVIEW GUI Gallery
-
 kongmingpeng
on:
Font Sizes in LabVIEW - Conversion Utility VI
-
 Sibin
on:
Infotainment system UI Developed with Labview
-
 OptiJohn
on:
Menu bar shode be hidden in exe
-
 Ben
Ben
 on:
Adding new UI objects to the front panel (and even link data) on Run-Time :)
-
 robertocsp
on:
An alternative to Loading Animation
-
 CJW1800
 on:
Loading Animation (remake of the VS 2012 Installer Screen)
-
 CodePeasant
on:
Advanced Resizable UIs: Multicolumn Listboxes
Advanced Resizable UIs: Multicolumn Listboxes
- Subscribe to RSS Feed
- Mark as New
- Mark as Read
- Bookmark
- Subscribe
- Printer Friendly Page
- Report to a Moderator
In my previous post, "Resizable UI’s in LabVIEW", I went through the basics of creating a flexible and professional user interface that scales to any screen resolution. If you’re new to creating resizable user interfaces in LabVIEW, I recommend you start with that post.
Introduction
Equipped with an understanding of splitter bars, panes, and fitting controls/indicators it’s easy to imagine how we can create nice looking UIs. So off I go, creating a UI for a new configuration utility. I drop a multicolumn listbox down in my largest pane, fit it to the pane, and set up my columns exactly as I want them.
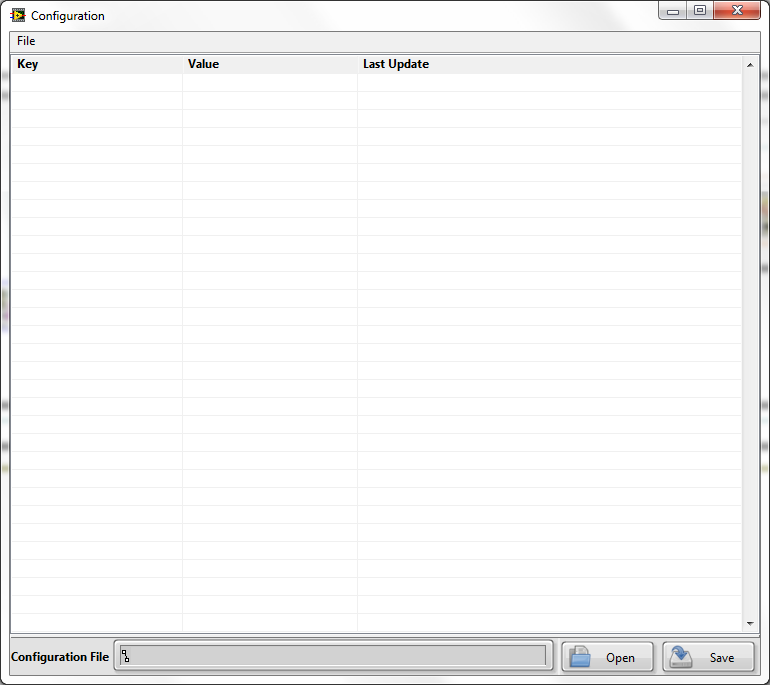
Looks good so far – I’ve followed all of the rules about making my UI resize, so let’s maximize this window and watch the resizing glory.
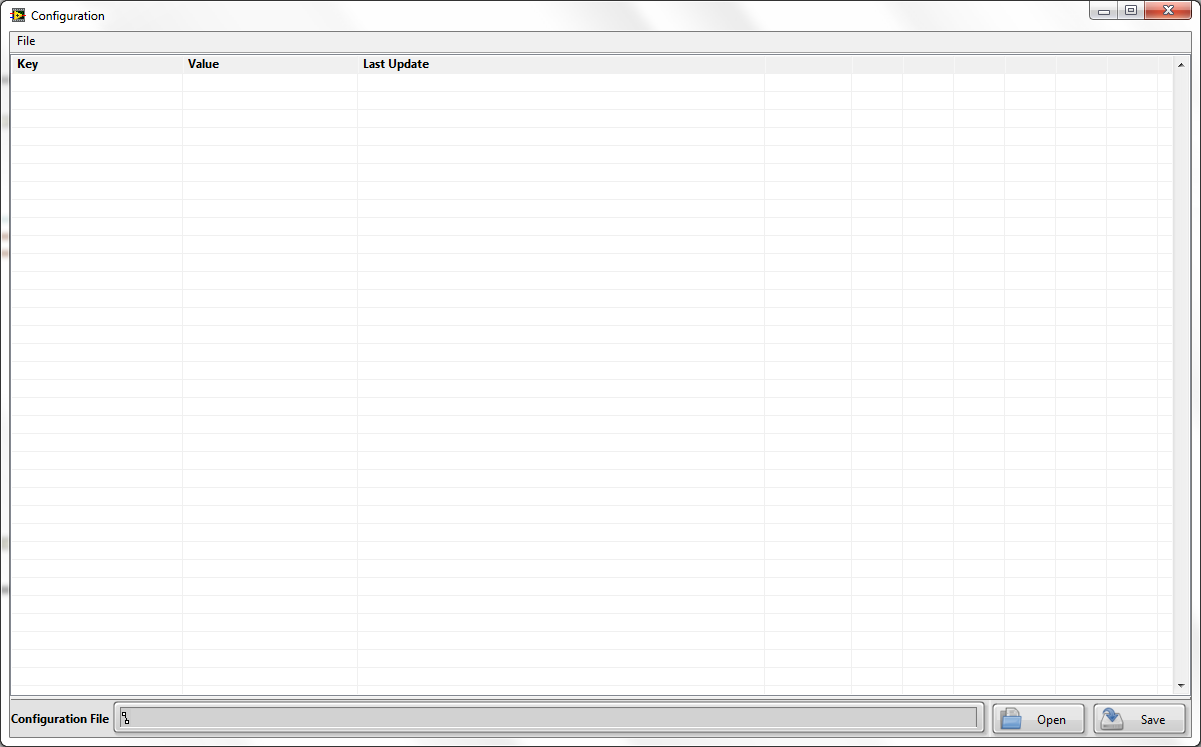
Not quite what I had in mind. I only need 3 columns, now I have 10. Your natural LabVIEW instinct will tell you start wading through the various property node options but unfortunately you won’t find a quick fix here. This requires code.
When creating complex applications, you will quickly find that the items you want to scale easily, rarely cooperate. In my previous post, I mentioned a few items that require a little more effort and some code to make them work.
Some of these items include:
- Multicolumn Listboxes
- XControls
- Subpanels
In this post, I will only be focusing on Multicolumn listboxes but will be covering XControls and Subpanels in the future.
Multicolumn Listbox Resizing
Multicolumn listboxes tend to resize best vertically. The problem (as demonstrated) is when we expand horizontally we end up with extra columns or fewer columns. The extra columns make the UI appear cluttered and difficult to read. They tend to make your UI look like you’re working in Excel, and the higher the screen resolution – the worse it gets. Now the question is what behavior do I want my multicolumn listbox to take? Here are a few of the most commonly used options:
- I want the columns to grow proportionally and distribute across the screen.
- I want the columns to hold their width, but have my final column extend to infinity to reduce the amount of clutter.
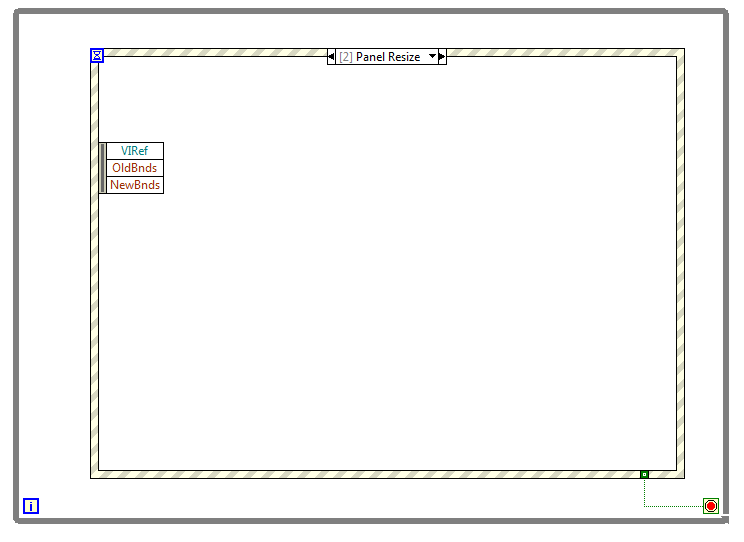
To capture a screen resize event, we can use the event structure and the event for “Panel Resize”. The three properties we can make use of in this event are; VIRef, OldBnds and NewBnds corresponding to the VI reference, the previous screen size, and the new screen size respectively. To complete the process, we need to create a code module to do some multicolumn listbox resizing.
Proportional Distribution
This is the most commonly used type of multicolumn listbox resizing. We can determine the percentage of the listbox that each column consumes and maintain the proportions as the screen grows or shrinks. This is illustrated below:
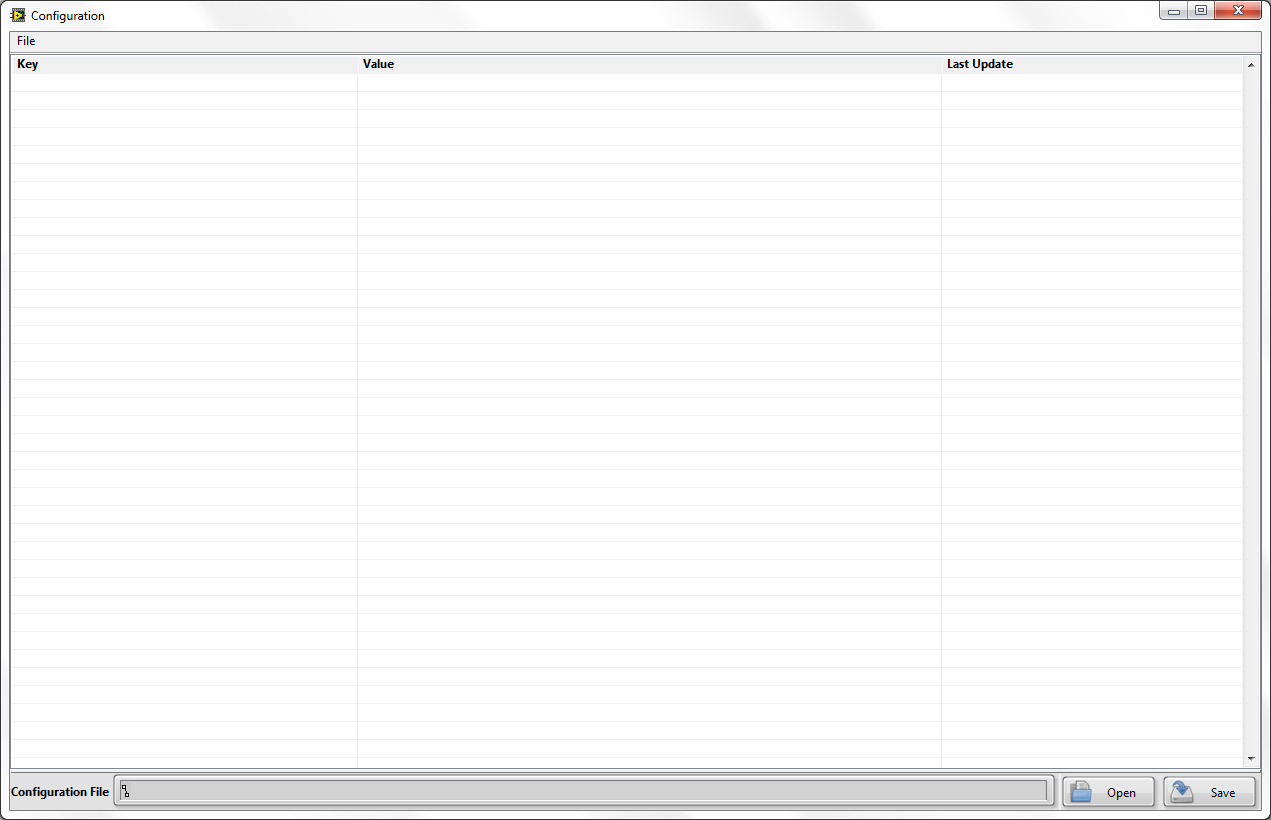
The downside to this method is that data becomes sparse on a large screen resolution. For multicolumn listboxes, which do not occupy the entire screen, proportional distribution is the ideal method. For large listboxes that occupy the entire screen, we may be better off using last column only growth to maintain the look and feel of the application.
Last Column Only
This is another common method for resizing, where only the final column grows. This allows you to maintain the defined column layout, while reducing the clutter introduced by the extra columns typically generated by growing the window.

This method is nice for listboxes which occupy the entire screen. It maintains your layout and does not space data out or alter the appearance of the application.This is all great, but how is it done? Let’s take a look.
The Code
In order to make this function reusable for many listboxes, we will create a generic subVI. This subVI will be dropped into our event structure for screen resize events.
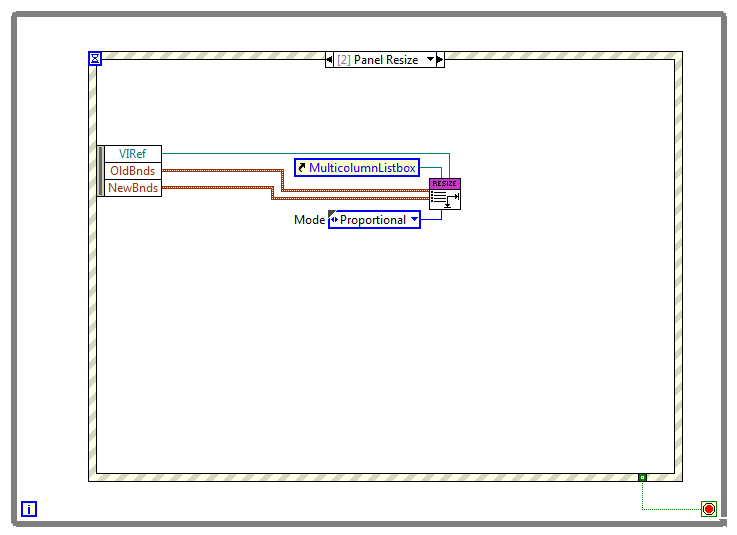
The code accepts a VI reference in order to Defer Panel updates; a listbox reference; the old panel size; the new panel size; and a resizing mode.

For the proportional method on the block diagram, we perform the following steps:
- Determine how many pixels the screen has grown by.
- Determine if the new bounds are different from the old bounds, if not don’t do anything.
- Defer Panel Updates so that the columns resizing happens faster.
- Count the number of columns and filter blanks.
- Determine the width of each column.
- Find the original proportion of the column in relation to the previous screen size.
- Adjust each column width proportion multiplied by the new screen size.
- Turn off Defer Panel Updates.

For the last only method on the block diagram, we perform the following steps:
- Determine how many pixels the screen has grown by.
- Determine if the new bounds are different from the old bounds, if not don’t do anything.
- Defer Panel Updates so that the columns resizing happens faster.
- Count the number of columns and filter blanks.
- Determine the width of the last column.
- Find the original proportion of the last column in relation to the previous screen size.
- Adjust the last column width proportion multiplied by the new screen size.
- Turn off Defer Panel Updates.
Conclusions and Next Steps
These are two simple methods for resizing multicolumn listboxes. You could always adapt your own methods for more complex resizing, such as making specific columns grow and others remain fixed. Using my last post "Resizable UI’s in LabVIEW" and the code presented in this post, more complex resizable user interfaces are now possible. In the future, I will give instructions on creating resizable subpanels and XControls which takes resizing all the way to complex architectures and reusable plugins.
Graham Beauregard
You must be a registered user to add a comment. If you've already registered, sign in. Otherwise, register and sign in.

