- Subscribe to RSS Feed
- Mark Topic as New
- Mark Topic as Read
- Float this Topic for Current User
- Bookmark
- Subscribe
- Mute
- Printer Friendly Page
custom window shape
10-09-2014 07:48 PM
- Mark as New
- Bookmark
- Subscribe
- Mute
- Subscribe to RSS Feed
- Permalink
- Report to a Moderator
Hi everyone , so happy to reach this site , you are awesome people !!
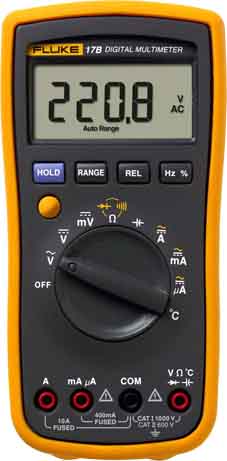
I'm making a virtual power supply to control an external DC supply at college and i want the GUI to look beautiful , i'm looking the way to make the background image fit the window and not to have a squared window like most applications , in other words i need the window shape to look like the image "power.supply.window.shape.jpg" and not to be a squared one .
Thanks a lot !!!
10-09-2014 08:07 PM
- Mark as New
- Bookmark
- Subscribe
- Mute
- Subscribe to RSS Feed
- Permalink
- Report to a Moderator
This discussion should point you in the right direction: http://lavag.org/topic/13373-front-panel-with-round-corner/
10-09-2014 08:10 PM
- Mark as New
- Bookmark
- Subscribe
- Mute
- Subscribe to RSS Feed
- Permalink
- Report to a Moderator
You may also be able to use this trick: Transparent Window.llb
10-09-2014 09:03 PM
- Mark as New
- Bookmark
- Subscribe
- Mute
- Subscribe to RSS Feed
- Permalink
- Report to a Moderator
Here it is using Transparent Window.llb
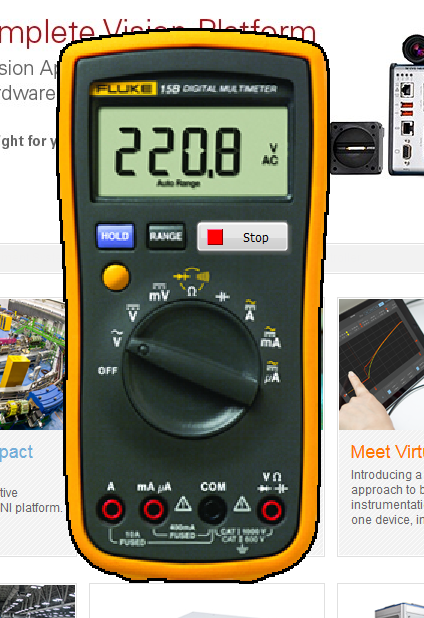
Unfortunately this method doesn't allow for nice smooth edges. My image is scaled up so the pixelation on the edges is exaggerated. A higher resolution image will improve it.
10-10-2014 10:02 AM
- Mark as New
- Bookmark
- Subscribe
- Mute
- Subscribe to RSS Feed
- Permalink
- Report to a Moderator
Hey thank you very much for your time !! what you did was exactly what i was trying to do , but i'm quite new with labview & i can't figure out how did you achive the transparency , i mean : where is the picture located ?, i saw that you painted the background pink so that in the block diagram make the pink background transparent but i can't find where is the image with the instrument & the pink background in order to replace that image with mine .
I hope you understand , thank you very much , this was so helpful !
10-11-2014 03:51 AM
- Mark as New
- Bookmark
- Subscribe
- Mute
- Subscribe to RSS Feed
- Permalink
- Report to a Moderator
You may want to look at this
https://decibel.ni.com/content/blogs/labviewramblings/2013/11/30/groovy-splash-screen
In the comments it links to examples etc
Love
Steve
Steve
Opportunity to learn from experienced developers / entrepeneurs (Fab,Joerg and Brian amongst them):
DSH Pragmatic Software Development Workshop
10-22-2014 06:37 PM
- Mark as New
- Bookmark
- Subscribe
- Mute
- Subscribe to RSS Feed
- Permalink
- Report to a Moderator
The image is pasted onto the front panel.
Edit > Import Picture to Clipboard... Then paste onto front panel.
Set the front panel properties to not show the menu bar or title bar.
File > VI Properties > Window Appearance > Customize >
Uncheck "Window has title bar", "Show menu bar", "Show vertical scroll bar" and "Show horizontal scroll bar".
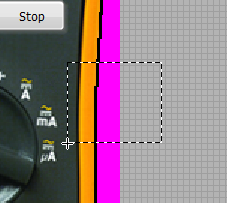
I edited the image in GIMP first to mask out the areas I wanted to be transparent.
The magic is done by a windows api function in USER32.DLL, "SetLayeredWindowAttributes".
This Windows API function makes a specified color on the specified window transparent to the windows desktop.
10-23-2014 01:03 PM
- Mark as New
- Bookmark
- Subscribe
- Mute
- Subscribe to RSS Feed
- Permalink
- Report to a Moderator
Hey TroyK thank you so much for your answer !
That's exactly what i thought the first time i tried to place my image , but when i paste the image from clipboard it does not become transparent during excecution , in the one you send to me (pink background),(DDM.vi) the image seems to be locked or something , i mean i can't select or move it , & when i paste mine i can do everything but it doesn't work . I hope you could understand , thanks again friend
The file tester azul.vi shows what i did !
10-23-2014 05:09 PM
- Mark as New
- Bookmark
- Subscribe
- Mute
- Subscribe to RSS Feed
- Permalink
- Report to a Moderator
Yes you are correct, I locked the picture so it would act as a background rather than an object.
That makes it easier to edit the front panel objects on top of it without continually selecting and moving the image etc.
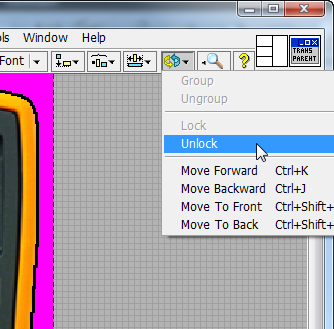
To unlock a locked object first you have to select it. To select it you have to click and drag a selection area starting outside the locked object and finish inside the locked object. There may be another way to select it but that is the way I know and use.
To unlock it use the "reorder" menu and click "unlock".
The windows chroma key function only works with an EXACT color match. I made sure in my image that I used #FF00FF (red 255, green 0, blue 255) as the background color and then used the exact same color value as the crkey imput into the function (decimal 16711935).
10-23-2014 10:16 PM
- Mark as New
- Bookmark
- Subscribe
- Mute
- Subscribe to RSS Feed
- Permalink
- Report to a Moderator
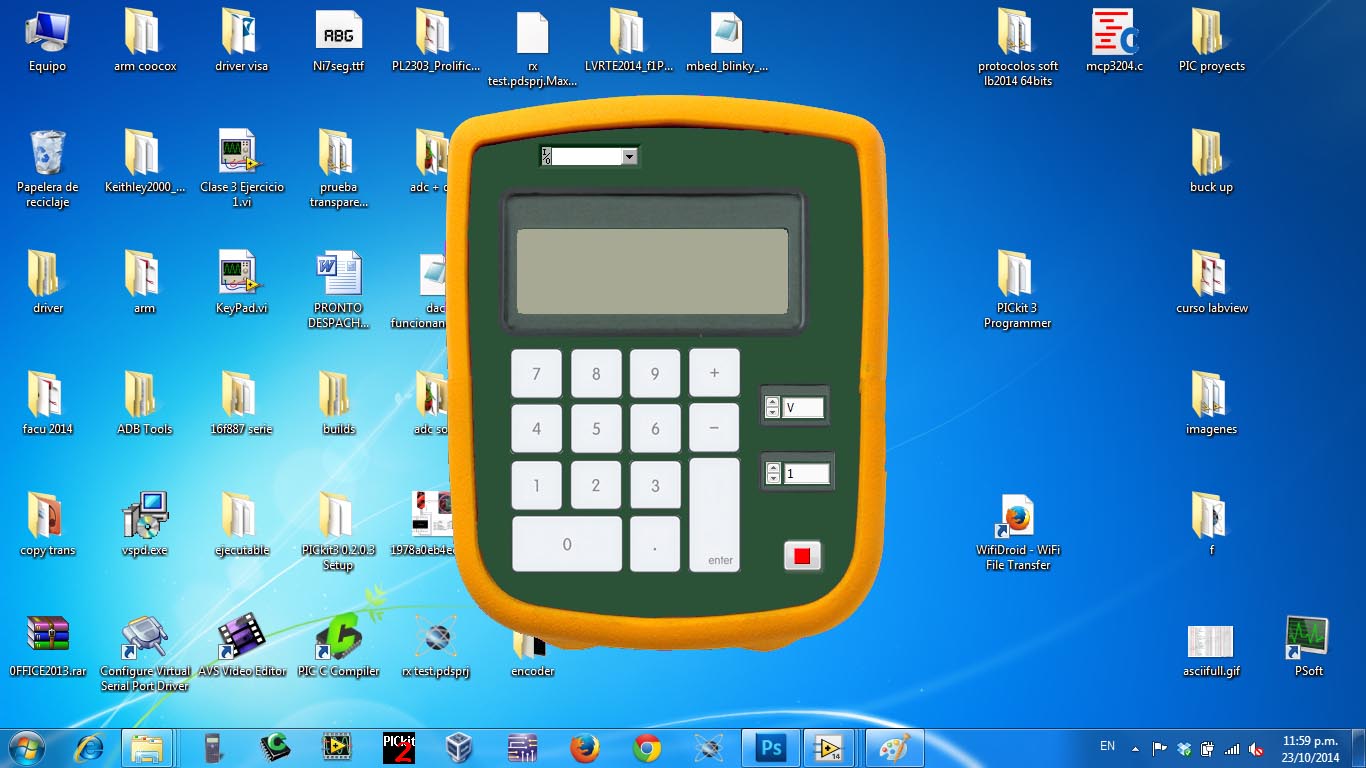
Finally thanks to you i made it !! thank you so much for answer all my questions & for your time !
This is the way it looks now