- Document History
- Subscribe to RSS Feed
- Mark as New
- Mark as Read
- Bookmark
- Subscribe
- Printer Friendly Page
- Report to a Moderator
- Subscribe to RSS Feed
- Mark as New
- Mark as Read
- Bookmark
- Subscribe
- Printer Friendly Page
- Report to a Moderator
Incorporate one of the following options to leverage hardware binding (in which the license file is bound to your hardware) in your add-on license. For a complete tutorial on how to license a deployment add-on, refer to: Licensing a Deployment Add-on.
Option 1: Bind the license file to your computer ID number
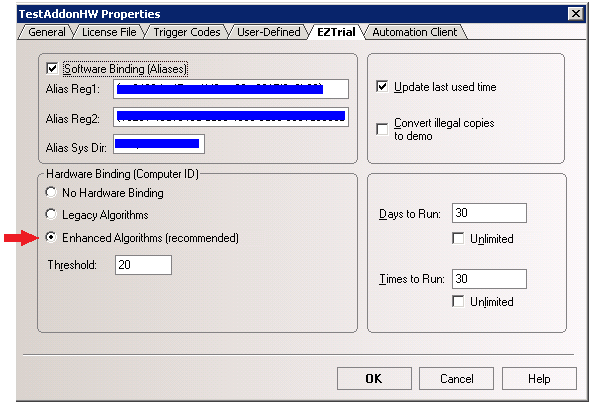
To implement hardware binding in which the license file is bound to the computer ID number use the Protection Plus Enhanced computer ID Algorithms.
- Follow the steps in Create a Product Definition for the Add-on to define a product definition in LFEdit for your add-on.
- Make sure you select the Enhanced Algorithms option in the EZTrial tab while setting up the definition.
3. After you have created a license file for the add-on use the Third Party Licensing & Activation VIs to enforce licensing in deployment add-ons that you build in LabVIEW.
- To check if a license file associated with an add-on is activated, in evaluation mode, expired, or invalid, use the Get License Status VI with customer hardware ID set to zero.
- To activate the license, use the Activate License VI and manually select the polymorphic instance you want to use.
Option 2: Bind the license file to a specific hardware target
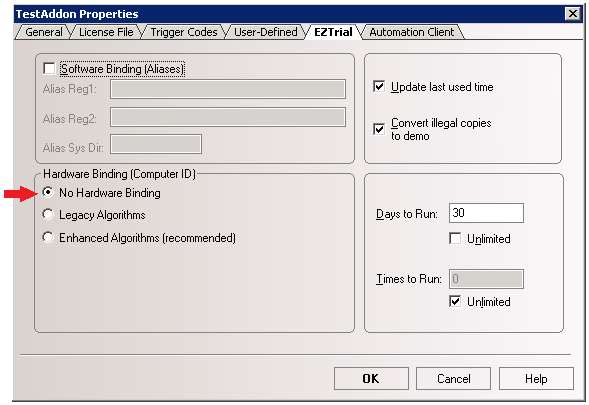
If you want to bind a license to a specific hardware target, use the custom hardware licensing method. It allows you to bind your license file to a custom hardware ID you specify. You can use the serial number of the hardware target to which you want to bind the license while activating it and if a user tries to use the license on a different target, the status of the license would show up as invalid.
- Follow the steps in Create a Product Definition for the Add-on to define a product definition in LFEdit.
- Make sure you select No Hardware Binding option in the EZTrial tab while setting up the definition.
3. After you have created a license file for the add-on use the Third Party Licensing & Activation VIs to enforce licensing in deployment add-ons that you build in LabVIEW.
- To check the status of a license file bound to a customer hardware ID, call the Get License Status VI and pass in the customer hardware ID used while activating the license. The custom hardware ID must match the number in the license. Otherwise Get License Status VI returns a license status of Invalid, even if the license has a status of activated or evaluation.
NOTE: The license also shows up as activated if the custom hardware ID input is not wired or is set to zero.
- To activate and bind a license file to a specific target, use the Activate License for Custom Hardware VI. You can choose to allow automated online activation, manual activation, or both, but you must manually select the polymorphic instance you want to use.
Refer to Third Party Licensing & Activation VIs for more details on how to add licensing checks to source code.
- Mark as Read
- Mark as New
- Bookmark
- Permalink
- Report to a Moderator
Hello Sumedha,
I want to bind the license with the specific hardware. For this, I used TPLAT Activate License for Custom Hardware API VI. I was able to activate the license successfully. After activation, I wanted to check the status of the license. For this, I used Get License Status API VI I am getting activated status even if I enter wrong custom hardware id. I am using LabVIEW 2015.
As per Get License Status API VI documentation if the custom hardware id is given wrong input I should get license status invalid but I am always getting activated status.
Regards
Hemant
