Adjustable Rectangular Overlay Line Thickness
- Subscribe to RSS Feed
- Mark as New
- Mark as Read
- Bookmark
- Subscribe
- Printer Friendly Page
- Report to a Moderator
Products and Environment
This section reflects the products and operating system used to create the example.To download NI software, including the products shown below, visit ni.com/downloads.
- Vision Development Module
- LabVIEW
Software
Code and Documents
Attachment
Overview
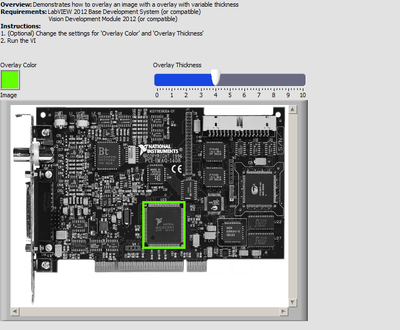
The example demonstrates how to overlay an image with a overlay with variable thickness.
Description
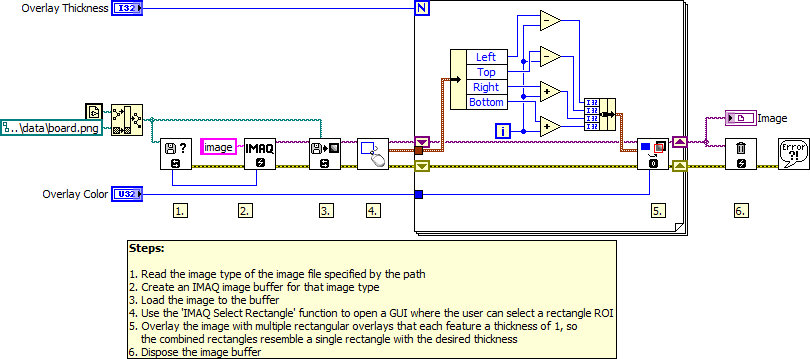
The example overlays a rectangle with variable thickness onto the image. The location of the rectangle is defined by the ROI the user selects during the execution of the VI. Since there is no overlay function that directly overlays an image with a rectangle of variable thickness, the example uses multiple overlays, so the resulting overlay appears to be a single rectangle of variable size.
Requirements
Software
- LabVIEW 2012 Base Development System (or compatible)
- Vision Development Module 2012 (or compatible)
Hardware
- No hardware is necessary to use this example VI
Steps to Implement or Execute Code
- (Optional) Change the settings for 'Overlay Color' and 'Overlay Thickness'
- Run the VI
Additional Information or References
**The code for this example has been edited to meet the new Community Example Style Guidelines. The edited copy is marked with the text 'NIVerified'. Read here for more information about the new Example Guidelines and Community Platform.**
Example code from the Example Code Exchange in the NI Community is licensed with the MIT license.


