Programmatically Renaming a Project Library or File
- Subscribe to RSS Feed
- Mark as New
- Mark as Read
- Bookmark
- Subscribe
- Printer Friendly Page
- Report to a Moderator
Products and Environment
This section reflects the products and operating system used to create the example.To download NI software, including the products shown below, visit ni.com/downloads.
- LabVIEW
Software
Code and Documents
Attachment
Description
Description-Separate-1Overview:
This example uses the System Exec VI to execute a command-line call to change the name of a library on disk.
Description:
When used in conjunction with auto-populating folders, names of files in your Project Explorer will also be automatically updated. This code works for project libraries, and for a wide variety of other file types.
This example starts by building a string that contains the command prompt. The user specifies the file to be renamed, the new name, and the directory of the file. A string is built containing the command prompt "cmd c/ rename oldFilename.ext newFileName.ext," and this string is passed to the System Exec VI. This VI allows you to execute system level commands. In this case, the VI simply accesses the Windows OS command prompt and uses Windows OS commands to rename the file on disk. More information about the System Exec VI can be found in the LabVIEW Help.
This VI is also configured to be usable as a sub-VI. Simply drag and drop the VI from your project into another VI and wire the inputs with the necessary information.
In order to have the name of the file update in your Project Explorer, you can include the library in an autopopulating folder. The names of the files within these folders will update as the names of the file on disk update. To add an autopopulating folder, right click on My Computer in the Project Explorer window. Select Add»Folder (Autopopulating)...
Steps to Execute Code:
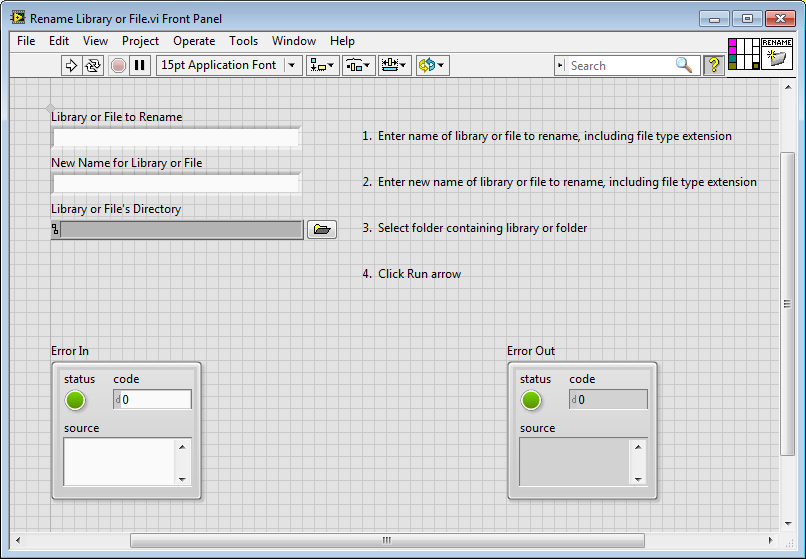
1) Download Rename Library or File VI.
2) Add VI to your project (if desired).
3) Open Rename Library or File VI, enter the file names and locations, then press the Run button.
4) An "Undo File Rename?" dialog box may appear. Select Accept As New File.
5) If prompted to "Save changes before closing?" for the previous file name, select Don't Save.
6) The name of the library or file should be updated on disk, and if it is in an autopopulating folder, in your project.
Steps to Implement Code:
1) Create a project (or open one).
2) Create a library (or find one) and save it in a specific folder on disk.
3) In the Project Explorer, right-click on My Computer and select Add>Folder (Auto-populating). Select the folder containing the library that you want to rename.
4) Add Rename Library or File VI to your project.
5) In the Library or File to Rename input and New Name for Library or File input, change the name to the library or file that you want to change and set the new name that you require.
6) In the Library or File's Directory input, set the path of the auto-populating folder containing the name changing library.
7) Run the VI.
 An "Undo File Rename?" dialog box may appear. Select Accept As New File.
9) If prompted to "Save changes before closing?" for the previous file name (Test2.lvlib), select Don't Save.
10) The name of the library should be updated on disk and in your project.
Requirements:
LabVIEW 2012, LabVIEW 8.6 (or compatible)
Windows (this example was created with Windows 7)
Additional Information or References:
Troubleshooting:
If the VI runs, but the name change does not occur, double-check your file names and file paths for spelling mistakes and extra spaces.
Front Panel of Rename Library or File VI
Block Diagram of Rename Library or File VI

"**This document has been updated to meet the current required format for the NI Code Exchange.**"
Description-Separate-2Example code from the Example Code Exchange in the NI Community is licensed with the MIT license.
