ni.com checkout is currently experiencing issues.
Support teams are actively working on the resolution.
ni.com checkout is currently experiencing issues.
Support teams are actively working on the resolution.
Greetings Circuit Designers,
I decided to stop by and share a pleasent circuit design experience I recently had with Multisim and Ultiboard right before the weekend kicks-off.
As you may have already experienced, the integration between Multisim, Ultiboard, NI embedded platforms, and NI LabVIEW is one of the greatest offerings of our prototyping solution.
NI keeps investing in software tools and hardware platforms development to help engineers accurately simulate their system at a desktop level whether being an analog circuit, an FPGA code, or an embedded control system of both analog digital components including all system dynamics, as well as rapidly prototyping and deploying the design using modular embedded hardware platforms such as Compact RIO or OEM prototypes with Single Board RIO, and finally, Ultiboard PCB layout environment for custom board designs.
As an NI employee I feel very proud contributing to the engineers' success, however, with this design I felt even more proud being in the designer's shoes and being successful using NI's products.
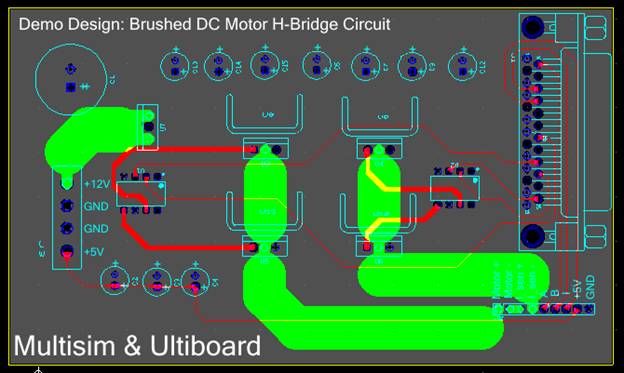
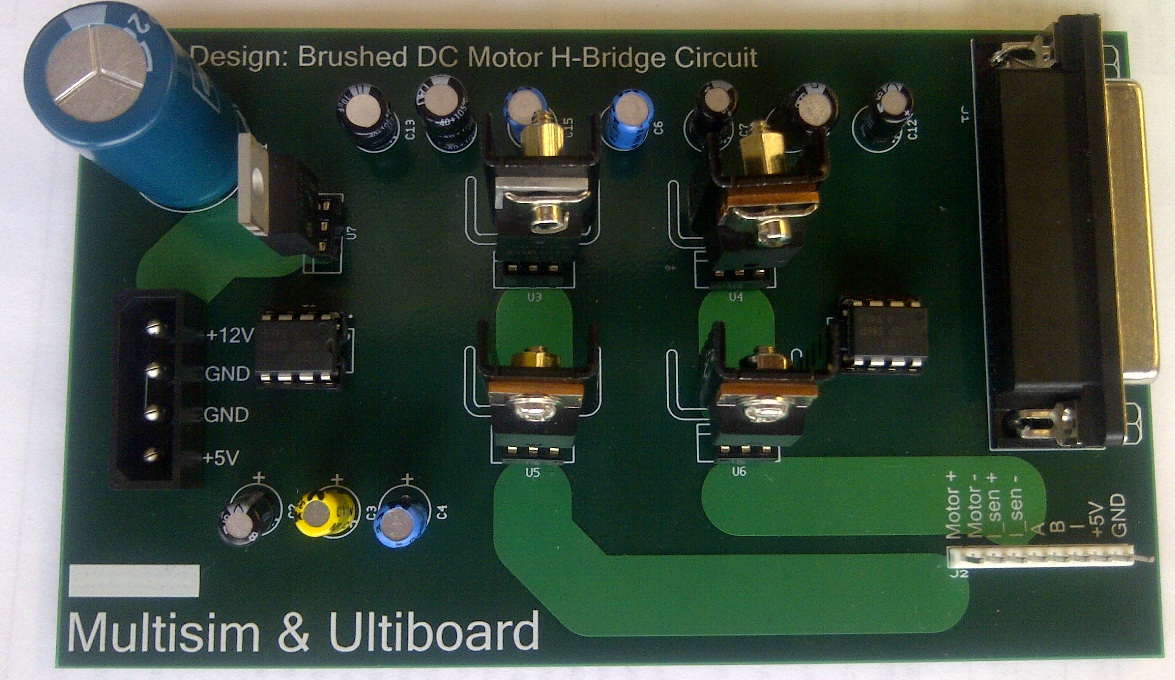
One of the projects that NI Toronto R&D team has been working on for a while, and published a Designcon 2012 paper in, is the system level desktop co-simulation of a brushed DC motor H-bridge control circuit in LabVIEW and Multisim and its implementation using Compact RIO. What I was working on is the prototyping of the analog circuitry on a PCB that interfaces to the Compact RIO platform and carries high current up to 20 A.
The detailed design steps are listed in this tutorial, but what I was really amazed of is that in no more than 6 hours I managed to accomplish the following tasks in Multisim and Ultiboard and my final design was working perfectly from the very first prototyping iteration:
1. Creating the schematic capture of the design
2. Transferring the design to Ultiboard and creating the PCB design including:
2.1 Creation of 2 component footprints from scratch
2.2 Manual routing of high current tracks
2.3 Power planes and board outline definition
2.4 In-place editing of footprints on an already routed board
3. Generating the Gerber files and sending them out to NI partner, Sunstone Circuits, for fabrication
4. Ordering the components from our partner, Digi-Key
5. Solder the board and test it with the hardware for prototype validation
Below I added some screenshots or the design.
Have a great weekend and enjoy,
Mahmoud

You must be a registered user to add a comment. If you've already registered, sign in. Otherwise, register and sign in.
